

Tuesday, November 27, 2012
Easy Biscuit Topped Turkey Pot Pie
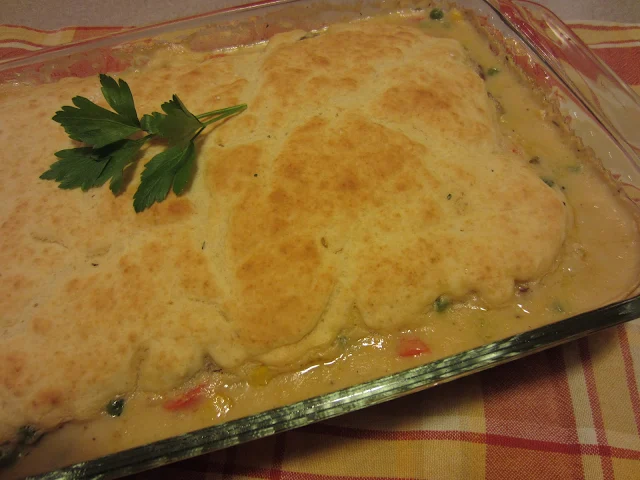
Easy Biscuit Topped Turkey Pot Pie is a perfect way to transform your Thanksgiving leftovers. Turkey and veggies all play nice in this leftover casserole and are topped with a yummy biscuit topping!
Friday, November 16, 2012
WW Thanksgiving Ideas 6P+ and Under

 |
| Pumpkin Yeast Bread 3P+ (can be made into rolls as well) |
 |
| Roasted Brussels Sprouts w/ Maple-Balsamic Drizzle 3P+ |
 |
| Carrot Cake w/Maple Cream Frosting 6P+ |
 |
| Easy Butterfinger Dessert 5P+ |
 |
| Lightened Up Sweet Potato Pie 6P+ |
 |
| Roasted Delicata Squash 2P+ |
 |
| Creamy Cauliflower Mash 2P+ |
 |
| Fresh Apple Cinnamon Quick Bread 4P+ |
 |
| Garlic Roasted Green Beans, Mushrooms and Tomatoes 2P+ |
 |
| Microwave Escalloped Pears and Cranberries 3P+ |
 |
| Oatmeal Bread 3P+ |
 |
| Broccoli, Cranberry and Pepper Salad 4P+ |
 |
| Lightened Up Classic Spinach Dip 2P+ |
 |
| Lightened Up Cheesy Scalloped Potatoes 4P+ |
 |
| Apple Cranberry Sauce 2P+ |
 |
| Buttermilk Mashed Potatoes and Cauliflower 4P+ |
Thursday, November 15, 2012
Lightened Up Cheesy Scalloped Potatoes

Thanksgiving is merely one week away! Let the countdown begin!
In my family, I host Thanksgiving dinner each year. My mom is in charge of the turkey. I am responsible for the remainder of the sides. My mom makes an awesome turkey that I really enjoy. But I will be honest, I get most excited for the sides. All the beautiful plentiful side dishes!
I posed the question on my FB page yesterday, "what are your favorite sides to enjoy at Thanksgiving?" I got a lot of responses! I think green bean casserole and stuffing made the top of the list for most who answered.
This easy and delicious Lightened Up Cheesy Scalloped Potato dish would be a winning addition to any holiday table.
It starts with Yukon gold potatoes. They are so buttery and flavorful on their own. They have a bit less starch than their counterparts, the russets, but aren't quite as waxy as red potatoes...making them the perfect choice for this dish. I chose to use whole milk in this recipe. The whole milk adds just enough fat to keep the sauce creamy with a silky texture, but keeps the overall total fat content per serving respectable. I will tell you, I also made this dish substituting a 1/2 cup of heavy cream for 1/2 cup whole milk called for in the recipe. The dish was slightly more creamy and decadent...and increased the P+ value by one. I furnished both nutritional stats if you choose to live on the wild side and go all out with the cream. Both versions are delicious though, and really so easy. To help keep things light, I also used reduced fat cheddar cheese.

If you think making these potatoes is hard...think again. Begin by scrubbing your potatoes well, but leave the skin on! I am not a huge fan of peeling potatoes. (I think it might have something to do with my childhood. I peeled pounds and pounds of potatoes for my mom as a kid! lol) Besides, I think the peels make the dish look that much more interesting.
Next you layer in the ingredients to make two layers... (This is the first one)
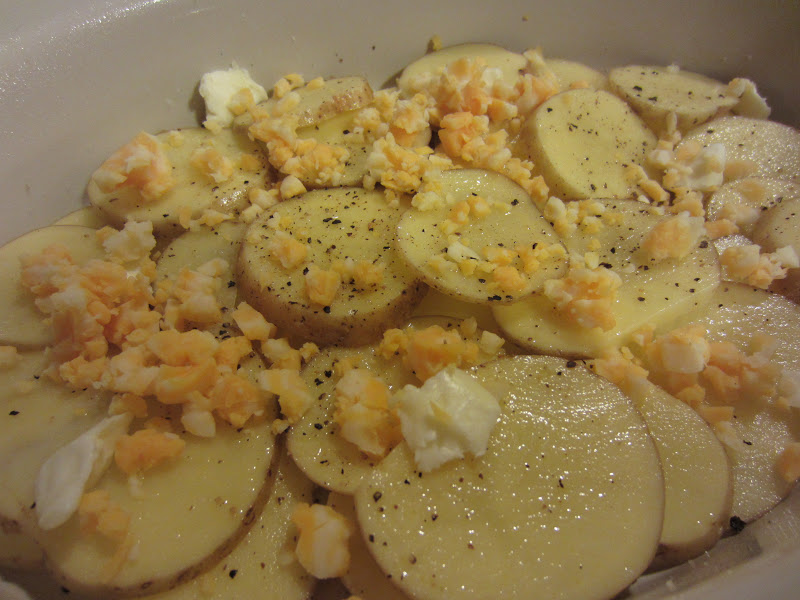
and pour on half the milk mixture...and repeat one more time.

Cover with aluminum foil and bake in 400 degree F oven for 30 minutes. Uncover and bake until golden on top for another 20 minutes or so. Then let the whole thing sit for 15 minutes before serving.

And voila! Perfection!
Lightened Up Cheesy Scalloped Potatoes
Servings - 8 Serving size - 1/8th of recipe (approx. 1/2 cup) Points Plus per Serving - 4 Points+
(subbing 1/2 cup heavy cream for whole milk - 5 Points+)
Calories - 134.1, Total Fat - 4.9g, Carb. - 19.2g, Protein - 6.2g, Fiber - 1.8g
*Nutritional information for swapping out 1/2 cup heavy cream for whole milk - Calories - 176.3, Total Fat - 9.9g, Carb. - 19g, Protein - 6.1g, Fiber - 1.8g
1 1/2 lbs. yukon gold potatoes, well-scrubbed and sliced into 1/4" slices (keep in cold water until ready to use)
1 TBS softened unsalted butter, divided
salt and pepper
1/2 cup reduced fat cheddar (or rf cheese of your choice), divided
2 cups whole milk (3.25% fat)
2 cloves garlic, minced
2 TBS all purpose flour
1 tsp. kosher salt
dash of ground nutmeg
1. Preheat oven to 400 degrees F. Thoroughly spray a 2 quart glass casserole dish ( or an 8 x 8" glass baking dish) with cooking spray.
2. In med sauce pan, combine the milk, garlic, flour, salt and nutmeg. Whisk until combined. Over med heat, cook until thickened, whisking often to avoid the mixture from sticking to the bottom of the pot. Once slightly thick and hot (about 5 minutes or so), take off heat.
3. Arrange 1/2 the potato slices in bottom of prepared casserole dish. Sprinkle with salt and pepper. Dot with half the butter. Sprinkle half the cheese on. Pour half the of the milk mixture on top. Repeat layer with remaining ingredients, except this time end with cheese instead of milk mixture.
4. Cover with foil and bake in oven for 30 minutes. Remove foil, and bake for another 20 minutes until top is golden brown and potatoes are fork tender. Remove from oven (it may look a little soupy on top...this will thicken as the casserole sits) Let rest for 15 minutes before serving.
---------------------------------------
The hardest thing about this dish is the baking time and the waiting time. It comes together so easy and ends up looking pretty impressive! I liked it both with the cream and without, but to be honest, there wasn't that big of a difference for me to add 5 more grams of fat and nearly 40 more calories per serving. The whole milk works well and stands up to the heat of the oven without curdling, without sacrificing creaminess and taste.
My husband requested that I make this dish next week. I might do this instead of mashed potatoes! I think it would be nice change up.
I started my shopping yesterday for our Thanksgiving dinner. I will definitely need to make another trip to the store next week, but was glad to get a good chunk of things bought and ready to go. I have to admit, I forgot my list at home, so I was living on the wild side in the store...trying to remember all the things I needed. I've been hosting Thanksgiving for many years though, so it wasn't all that hard. I did forget a few things though.
How about you? Are you hosting Thanksgiving or going to someone's house and bringing a dish?
Tuesday, November 13, 2012
Roasted Delicata Squash

Delicata Squash, have you tried it yet?
Delicata squash is a winter squash with distinctive longitudinal dark green stripes on a yellow or cream colored background and sweet, orange-yellow flesh. It has a mild flavor, similar to butternut squash, but not quite as sweet. And the best part... you can eat the skin! That's right, no need to peel!

I was so surprised to see this squash make an appearance at my grocery store, I knew I had to try it!
To prepare, you wash the exterior of the squash well. Slice off the stem end and the bottom end and cut lengthwise. Once the pulp is exposed, you can scrape out the seeds and the pulp until you are left with only the flesh and the skin of the squash. ( You can also roast the seeds just like pumpkin seeds, if you desire.)

Then you simply cut it into half-moons and you are ready to roast! Roasting brings out the sweetness of the squash as well as a good amount of flavor.

I chose to coat the delicata squash in some brown sugar, cayenne, salt and olive oil. I lined my baking sheet with a silpat and roasted the squash, flesh side down, for about 25 minutes at 425 degrees F, turning over the pieces half way through.
The result?

Roasted delicata squash is so colorful and delicious! If you enjoy other winter squashes such as butternut, pumpkin or acorn, you will love this squash.
Wouldn't this side dish would make a wonderful addition to your Thanksgiving table?
Roasted Delicata Squash
Servings - 4 Serving size - 1 cup Points Plus per Serving - 2 Points+
Calories - 82.8 Total Fat - 3.4g, Carb. - 13.9g, Protein - 1.3g, Fiber - 4g
4 cups, cleaned and cut delicata squash ( about 2 medium sized squash)
1 TBS brown sugar
salt and pepper, to taste
cayenne, to taste
1 TBS extra virgin olive oil
1. Heat oven to 425 degrees F. Line baking sheet with silpat or parchment to prevent squash from sticking to the pan.
2. Combine squash pieces, brown sugar, salt, pepper, cayenne pepper and olive oil in large bowl.
3. Arrange squash, cut side down on prepared baking sheet. Don't over crowd.
4. Roast in oven for 20 -25 minutes, turning to other cut side half way through. Squash is done when flesh is soft but still holding together.
---------------------------------------------
I really love to try new fruits and vegetables, and this squash was new to me. My whole family really enjoyed this as a side dish to pork chops. I love that I didn't have to peel it. I like butternut squash, but peeling it, not so much. And 4g of fiber per serving is great!!
How about you? Do you like trying out new produce? I always feel you never know if you will like it until you give it try, and thanks to the internet, it's easy to research ways to cook and eat what you have found!
Thursday, November 8, 2012
Crunchy/Chewy Granola Bars

I don't mean to brag, but my youngest son is a bit of a health nut. He refuses to eat anything with HFCS and will choose to have fruit as a snack before candy. He likes it when I put raw carrots and nuts in his lunch. He will order broccoli instead of fries every time we eat out at a restaurant. That's how he rolls....
I'm lucky.
So in order to keep my youngest happy, I've been on the search for a really good crunchy granola bar recipe. I've yet to find one, but I did stumble across this recipe for granola bars, and found that the secret to crispy vs. crunchy (at least with this particular recipe) lies in how long you cook the honey/coconut oil mixture before mixing with the oats. I changed up quite a few ingredients to adapt this recipe to my taste...but it really is a pretty good recipe...and the bars come out looking like bars, and keep their shape nicely. No, they aren't really crunchy...but almost. I think if you want to experiment and cook the honey mixture even longer than I do, you might get even more crunch. But this is a nice middle ground. Soft enough to cut easily, yet a bit of a crunch to them when you bite.


And they are healthy....
Healthy enough for my son. Which is a good thing!
I've made mine with pecans and dried blueberries...but the combos you can make are endless really. You can sub out any nut or dried fruit you desire! (you could even guild the lily with some mini chocolate chips!)
Make sure you follow the instructions...there is lots of room for error in these. But...um...don't ask me how I know...
Crunchy/Chewy Granola Bars
Servings - 12 Serving Size - 1 bar Points Plus per Serving - 5 Points+
Calories - 183.4, Total Fat - 8.4g, Carb. - 27g, Protein - 3.2g, Fiber - 3.1g
Ingredients:
2 cups Old Fashioned Oats (do not use quick cooking)
1/4 cup ground flax seed
1/3 cup raw sunflower kernels (seeds)
1/3 cup shredded sweetened coconut
1/4 cup roughly chopped nuts of your choice (I used pecans)
1/2 tsp ground cinnamon
1/4 tsp ground ginger
1/4 tsp freshly ground nutmeg
1/2 cup honey
2 TBS coconut oil
1/2 tsp pure vanilla extract
1/4 tsp salt (you can omit, but it is nice to have it to balance the sweetness of the honey)
1/2 cup dried fruit of your choice (I used dried blueberries)
Directions:
1. Preheat oven to 350 degrees F. Pour oats onto a dry baking sheet and toast in oven for 10 - 12 minutes. Remove and set aside. Line an 11 x 7" pan ( brownie/biscuit pan) with parchment paper so the parchment extends over the side of the pan. Spray inside of pan, liberally with cooking spray.
2. In large bowl, mix together the toasted oats, ground flax, sunflower kernels, coconut, nuts, cinnamon, ginger, nutmeg and dried fruit.
3. In small to med sized sauce pan, combine the honey and coconut oil. Cook over heat. When the mixture starts to bubble up, reduce heat to keep it gently bubbling. Let it bubble for 10 - 12 minutes, or until the mixture turns a golden color. ( it will start of pale and increase color as it bubbles) Basically, you are cooking this mixture to somewhere between hard ball and soft ball consistency...like when you make candy. If you go too far, you will get bars that are dry and very hard. If you don't go far enough, they will be soft and fall apart. This step is the KEY!
4. Remove honey mixture from heat and add in the vanilla and salt. Stir to combine. Pour the honey mixture onto the oat mixture and fold in well, until everything is covered in the honey mixture.
5. Pour mixture into prepared baking pan, and press down HARD. As hard as you can (I use a cup sized measuring cup to press with). Put into a 350 degrees F oven and bake for 10 minutes. Remove and allow to cool in pan for 20 minutes. Mixture will seem soft but will harden as it cools.
6. Remove the bars with the extended parchment and allow to cool completely. Cut into 12 bars.
---------------------------------
I think I made 5 batches of this recipe, adjusting it each time, before I got it just to where I wanted it. I wanted to be able to still cut nice clean bars, so I didn't want it too crunchy. But I didn't want it too chewy either. I think I got it just right.
I was lucky to have an 11 x 7" pan in my cabinet. I've had one for a long time. I know it really isn't a standard size. You could use a smaller or bigger pan, but you may not be able to cut the recipe into nice bars. I thought about using two loaf pans...I think that might work too.
I know my son will be happy to have these bars in his lunch this week. They make a great, quick on the go breakfast too!
Looking for more?
Thursday, November 1, 2012
Lightened Up Pumpkin Spice Cupcakes with Cool Whip Cream Cheese Frosting
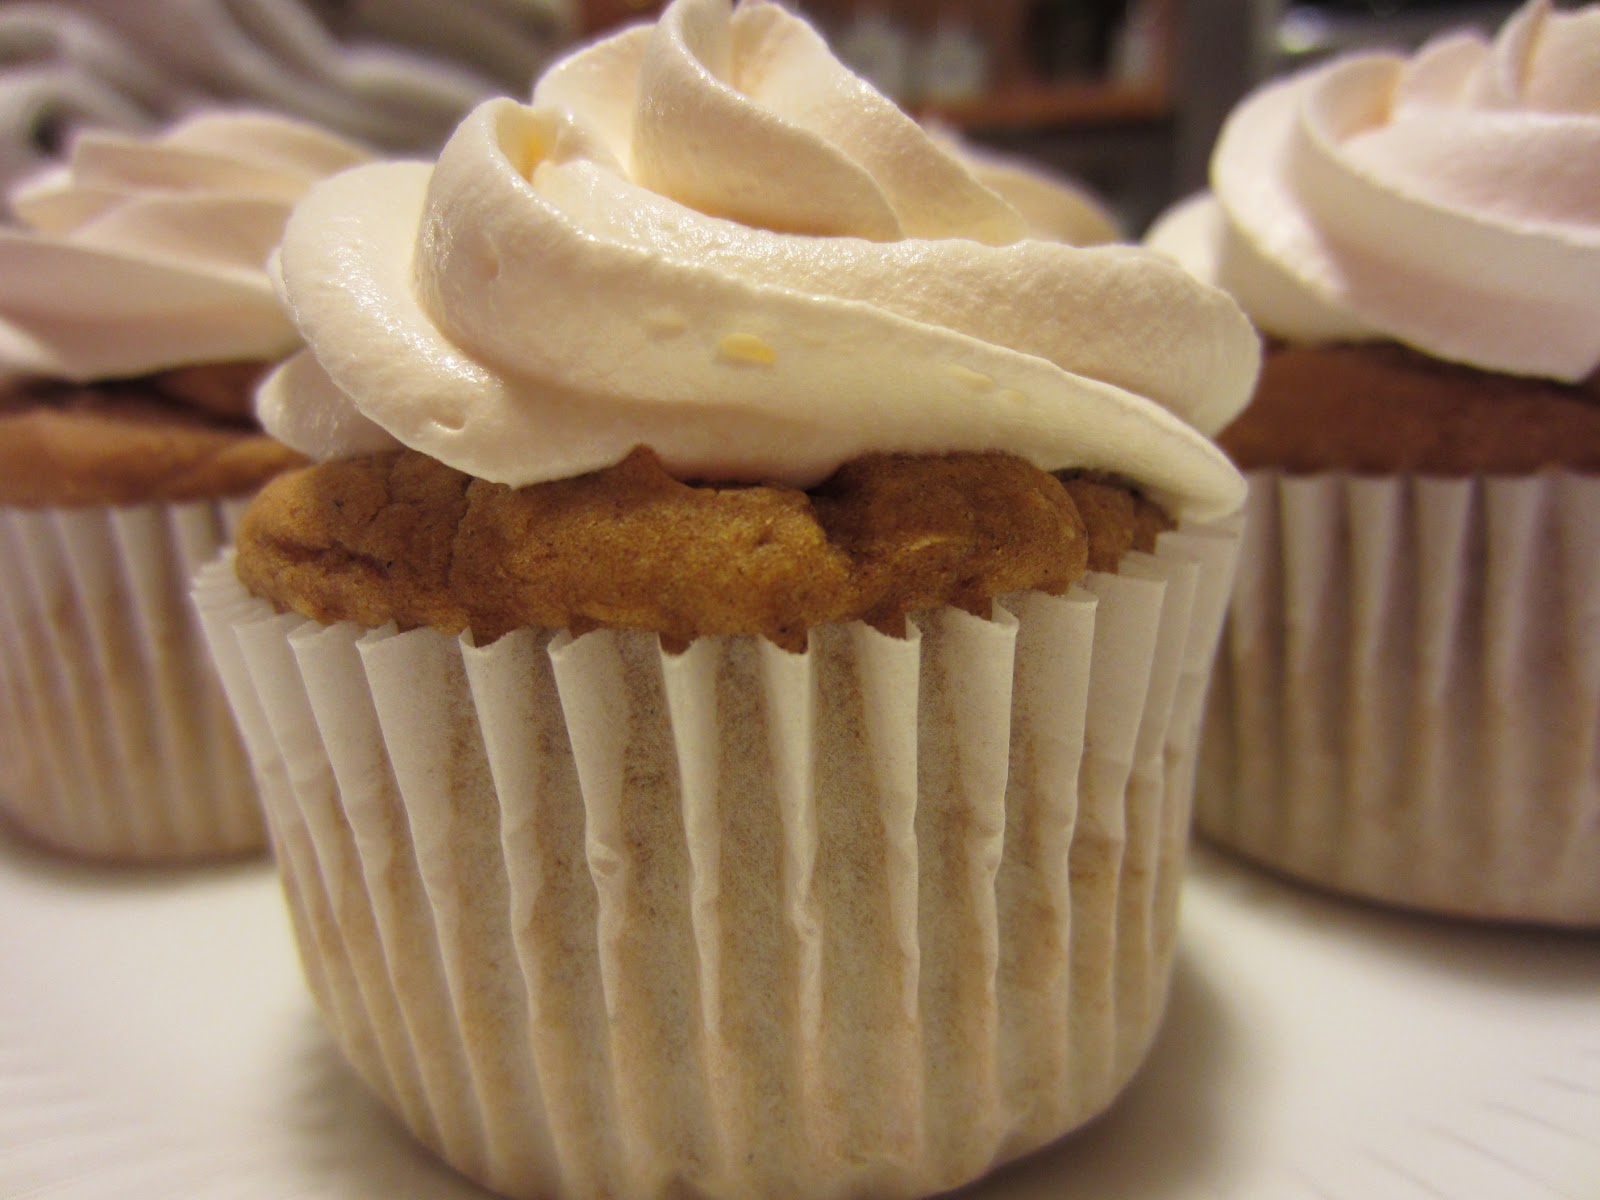
But let me warn you...these aren't light and fluffy cakes. They are dense and thick...almost gooey brownie like...which I am still on the fence whether I like or not...but they taste wonderful and I am in love with the frosting...so I decided to share. The cupcakes are made from a boxed spice cake mix, pumpkin puree, and pumpkin pie spice.
What I am really excited about is the frosting. It's a new food find for me...and I have only seen it at one store I shop at. It's Cool Whip Frosting, and it's available in cream cheese (pictured), chocolate, and vanilla. I have sampled them all and they all taste quite good. And the best part? They are only 60 calories per 2 TBSP (2P+), which is about the amount of frosting pictured on the cupcake above.


Now I know it has a lot of ingredients in it that are less than healthy, but this is a once in awhile product. You won't be eating this everyday (well, at least you shouldn't be eating this daily!)...and it is so much better than the canned stuff! Lower in calories, fat and sugar...and it tastes better!
This stuff is so new I can hardly find any product information on it. That's why I haven't provided any links to follow. They just don't exist.
So how does it taste? You can definitely taste the cool whip component in it. It's light and fluffy, yet it has enough body to stand up to piping. It has a richness to it, even though it's light. You can definitely taste the vanilla in the vanilla flavor, the cocoa in the chocolate flavor, and the cream cheese in the cream cheese flavor, although the vanilla flavor and the cream cheese flavor are more subtle than the chocolate flavor . Please note that I bought this product with my own money and the opinions expressed are mine. I have not been compensated by Kraft in anyway.
You can find this product in the freezer section, by the other cool whip products. To use, you simply defrost.
It's really hard to find a decent frosting that is low enough in calories to top lightened up cake recipes. This one really fits the bill. Plus, doesn't it look beautiful piped on top of these cupcakes?

Lightened Up Pumpkin Spice Cupcakes with Cool Whip Cream Cheese Frosting
Servings - 18 Serving Size - 1 cup cake with 2 TBS Cool Whip Cream Cheese Frosting
Points Plus per serving - (WITHOUT frosting) 3 Points+, (WITH frosting) 4 Points+
For Cupcakes WITHOUT frosting - Calories - 91.2, Total Fat - 0.9g, Carbs - 20.5g, Protein - 1.2g, Fiber - 0.2g (3P+)
For Cupcakes WITH frosting - Calories - 151.2, Total Fat - 4.4g, Carbs - 28.5g, Protein - 1.2g, Fiber - 0.2g (4P+) *don't ask me how, but this is just how the math turns out.
1 - 15.25 oz. box of Spice Cake Mix ( I used Betty Crocker brand)
1 - 15 oz. can of 100% pure pumpkin puree
3/4 cup water
1 - 2 tsp. pumpkin pie spice
1- 10.6 oz. container of Cool Whip Frosting, Cream Cheese flavor (you won't use all of it)
1. Preheat oven to 350 degrees F. Line cupcake pan(s) with 18 liners or generously spray wells with cooking spray.
2. Combine cake mix, pumpkin puree, water and pumpkin pie spice. With electric mixer on low, combine ingredients then turn up to med-high and beat for 2 minutes. The batter will be thick. Portion out the batter into the wells, filling each about 2/3 full to 3/4 full. ( I used a scoop to put the batter into the wells...it's thick and this worked well)
3. Bake in oven for approx. 20-25 minutes. This batter doesn't spread well. It does raise a bit, but less than traditional cupcake batter, and the tops get a crackle appearance. Cool on wire rack. When completely cool, frost each one with 2 TBS of Cool Whip Frosting.
-------------------------------------
Dense, almost pumpkin pie-like, texture to these cupcakes. I've made chocolate cake with pumpkin puree before, but used a bundt pan to make an entire cake...which we really enjoyed. Like I said, I am on the fence about the texture of these cupcakes, as I like my cupcakes light and fluffy. But the pumpkin taste is most definitely there, unlike how it hides in chocolate cake. Because I made my cupcakes small, and got 18 out of the mix, I was able to reduce the PP to 3P+ per cake, which is great!
The real star of these cupcakes is this wonderful frosting though! I love this new for me food find. And how crazy is it that you can eat a well frosted cupcake for 4P+?? Love that!
Subscribe to:
Posts (Atom)