Renee's Kitchen Adventures: 4 points
Showing posts with label 4 points. Show all posts

Wednesday, September 17, 2014

Easy Skillet Chicken with Mustard Beer Sauce

Looking for something quick and easy to do with your chicken?  Look no further, because this Easy Skillet Chicken with Mustard Beer Sauce is your answer!  Full of flavor thanks to a little of your favorite brew and a new variety of Maille mustard, Honey Dijon with Balsamic Vinegar. 

Easy Skillet Chicken with Mustard Beer Sauce: Fast, healthy meal for any day of the week!
(Pin this to your Chicken Board for later!) 

Thursday, March 20, 2014

Broccoli, Kale, & Brussels Sprouts Slaw


This healthy salad, Broccoli, Kale, and Brussels Sprouts Slaw, is a delicious blend of sweet and savory.  Crisp veggies (broccoli slaw, fresh kale, and Brussels sprouts), dried cranberries, and pepitas in a sweet and sour poppy seed dressing make it shine! 

Close up of Broccoli, Kale, & Brussels Sprouts Slaw in white serving bowl with spoon


Thursday, July 18, 2013

Mini Peach Cobblers


I came across this recipe on my Facebook wall the other day.  One of my friends had saved it to their wall.  It sounded so easy and wouldn't you know it?...I had a pile of peaches that needed eating before they got bad.  Even with AC, in this heat, peaches ripen almost more quickly than we can eat them!  The original recipe called for canned peaches, which is just fine, but fresh peaches worked out great...and I decided NOT to peel the peaches because I don't like peeling peaches (does anyone LIKE peeling peaches? ) But I liked how they came out.  It gave the mini cobblers a nice rustic look and feel.

The original recipe also called for quite a bit of butter and sugar, which I reduced.  These are best served slightly warm...with some whipped cream or maybe a big old scoop of vanilla ice cream!

Be careful not to over fill the muffin wells with the batter ( I did that for a few of them...oops) or you will have some of the cake part crawling out of the wells and onto the surface of the pan.  But, these were definitely quick and easy to make and even easier to gobble up! 

This is a good recipe that you could substitute all kinds of fruit to make mini cobblers with...blueberries, raspberries, nectarines, blackberries.  Or how about combining some of the fruit flavors together?  Yum!  Fresh, canned or frozen fruit will work too.  The possibilities are almost endless. 


Mini Peach Cobblers
adapted from HERE


Servings - 11- 12 mini cobblers   Serving Size - 1 mini cobbler   Points Plus per Serving - 4 Points+
Calories - 136.4,   Total Fat - 4.2g,   Carb. - 23.9g,   Protein - 1.8g,   Fiber - 0.8g

about 2-3 medium sized (2 1/2" diameter) fresh peaches, pitted and sliced thinly
4 TBS unsalted butter, melted
1 cup all purpose flour
3/4 cup granulated sugar, divided
1/4 tsp salt
2 tsp baking powder
3/4 cup 1% milk
1 tsp lemon juice
2 tsp ground cinnamon

1.  Heat oven to 350 degrees F.  Lightly spray wells of muffin pan with cooking spray.

2.  Pour about 1 tsp. butter in each of the muffin pan wells.  Mix together milk and lemon juice.  Let sit.   In medium bowl, combine the flour, 1/2 cup sugar (save remaining 1/4 cup for topping), salt and baking powder.  Whisk to combine.  Whisk in the milk/lemon juice mixture until a smooth batter forms.  

3.  Drop about 2 TBS of batter into each muffin pan well on top of the melted butter, dividing equally between the 11-12 wells.  Place 2 - 3 slices of peaches on top of the batter.  Combine the remaining 1/4 cup sugar and cinnamon.  Sprinkle evenly on top of peaches and batter. 

4.  Bake in 350 degree F oven for about 12 - 15 minutes, or until golden brown on the bottoms and fruit is bubbly.  Remove from oven and let cool slightly in pan (10-15 minutes).  Remove cobblers from pan with large spoon and enjoy while still slightly warm. 

--------------------------------

This was quick, easy and yummy.  I'd like to try this with blueberries next time!  

How about you?  What fruit would you fancy in this quick dessert recipe?  


Friday, May 3, 2013

Lightened Up Hashbrown Casserole


I made this scrumptious potato casserole last week to go along with some BBQ ribs for dinner one night.  I changed up the recipe quite a bit but didn't sacrifice ANY of the flavor. We had my inlaws over for dinner and my MIL had seconds.

Ya, it's that good! 

This type of hashbrown casserole dish has been around for some time. If you haven't made it, you have probably eaten it at some time.   It's basically frozen potatoes, a can of condensed cream soup, cheese, sour cream, butter and cornflakes.  The original recipe called for 1/2 cup of butter mixed with crushed cornflakes for the topping, which I omitted completely.  I used 5 crushed up Ritz® crackers for the topping instead.  They were perfect and greatly reduced the fat and calorie count in this dish.  I used reduced fat sour cream and, because I didn't have any cream of mushroom soup, (as originally called for in the recipe) I used a can of cream of cheddar.  I totally replaced the processed cheese called for in the original recipe with a greatly reduced amount of reduced fat cheddar cheese and added some dried onion into the casserole for flavor (because when I have made this type of recipe in the past, that is what the recipes have always called for an I like the onion flavor with the potatoes).

The result was a winning potato casserole dish that comes in at 4 PP per 1/2 cup serving!

This is an excellent pot luck type dish that no one will know is reduced anything...and no one will miss that 1/2 cup of butter or all that extra cheese!!


Lightened Up Hashbrown Casserole 
adapted from Allrecipes


Servings - approx 16   Serving Size - approx 1/2 cup   Points Plus per serving - 4 Points Plus
Calories - 150,   Total Fat - 7.7g,   Carb. - 13.7g,   Protein - 6g,   Fiber - 1.4g


1-32 oz. package of frozen Southern-Style hashbrown potatoes
1 -10.75 oz. condensed cream of cheddar soup (NOT reduced fat)
16 oz. reduced fat sour cream
8 oz. reduced fat cheddar cheese, divided
1 TBS. dried onion
salt and pepper, as you like
5 Ritz® crackers, crushed (or other similar buttery type crackers)

1.  Preheat oven to 350 degrees F.  Spray a 13"x 9" casserole dish with cooking spray.  

2.  In large bowl, mix the soup, sour cream and the dried onion.  Measure out about a 1/4 cup of cheese and set aside.  Add the potatoes and the rest of the cheese to the soup/sour cream mixture and stir to combine.  Season with salt and pepper, as desired.  

3.  Pour potato mixture into prepared baking dish.  Top with the reserved 1/4 cup cheese and then the crushed crackers.  Bake in oven for about and hour or until the casserole is hot and bubbly all the way through.  (I did cover mine loosely with foil for about 45 minutes, then took the foil off for the last 15 to crisp up the cracker topping.) 

------------------------------------
Yum.  This turned out delicious and for so many less calories than the original.  I did make the serving size 1/2 cup, which I feel is perfect for a side dish, instead of the 1 cup serving size in the original recipe.  And yes, if you follow the link to the original recipe you will find my picture there, as this was another "faceless" AR recipe I gave a face to.  

Blogger is still having issues with photo uploads through my preferred browser, but I hear they are aware of the problem and working on it.  I did find a work around.  It just is a bit more work to download pictures.  

Also, Cinco de Mayo is this weekend!  Will you be celebrating with some Mexican dishes?  Here are a few of my picks to help make your celebration festive and diet friendly!!


Thursday, November 15, 2012

Lightened Up Cheesy Scalloped Potatoes


Thanksgiving is merely one week away!  Let the countdown begin!

In my family, I host Thanksgiving dinner each year.  My mom is in charge of the turkey.  I am responsible for the remainder of the sides.   My mom makes an awesome turkey that I really enjoy.  But I will be honest, I get most excited for the sides.  All the beautiful plentiful side dishes! 

I posed the question on my FB page yesterday, "what are your favorite sides to enjoy at Thanksgiving?"  I got a lot of responses!  I think green bean casserole and stuffing made the top of the list for most who answered.

This easy and delicious Lightened Up Cheesy Scalloped Potato dish would be a winning addition to any holiday table.

It starts with Yukon gold potatoes.  They are so buttery and flavorful on their own.  They have a bit less starch than their counterparts, the russets, but aren't quite as waxy as red potatoes...making them the perfect choice for this dish.  I chose to use whole milk in this recipe.  The whole milk adds just enough fat to keep the sauce creamy with a silky texture, but keeps the overall total fat content per serving respectable.   I will tell you, I also made this dish substituting a 1/2 cup of heavy cream for 1/2 cup whole milk called for in the recipe.  The dish was slightly more creamy and decadent...and increased the P+ value by one.  I furnished both nutritional stats if you choose to live on the wild side and go all out with the cream.  Both versions are delicious though, and really so easy.  To help keep things light,  I also used reduced fat cheddar cheese.

 
If you think making these potatoes is hard...think again.  Begin by scrubbing your potatoes well, but leave the skin on!  I am not a huge fan of peeling potatoes.  (I think it might have something to do with my childhood. I peeled pounds and pounds of potatoes for my mom as a kid!  lol)  Besides, I think the peels make the dish look that much more interesting.

Next you layer in the ingredients to make two layers...  (This is the first one)


and pour on half the milk mixture...and repeat one more time. 


Cover with aluminum foil and bake in 400 degree F oven for 30 minutes.  Uncover and bake until golden on top for another 20 minutes or so.  Then let the whole thing sit for 15 minutes before serving. 


And voila!  Perfection! 


Lightened Up Cheesy Scalloped Potatoes


Servings - 8   Serving size - 1/8th of recipe (approx. 1/2 cup)   Points Plus per Serving - 4 Points+ 
(subbing 1/2 cup heavy cream for whole milk - 5 Points+)
Calories - 134.1,   Total Fat - 4.9g,   Carb. - 19.2g,   Protein - 6.2g,   Fiber - 1.8g
*Nutritional information for swapping out 1/2 cup heavy cream for whole milk - Calories - 176.3,   Total Fat - 9.9g,   Carb. - 19g,   Protein - 6.1g,   Fiber - 1.8g


1 1/2 lbs. yukon gold potatoes, well-scrubbed and sliced into 1/4" slices (keep in cold water until ready to use)
1 TBS softened unsalted butter, divided
salt and pepper
1/2 cup reduced fat cheddar (or rf cheese of your choice), divided
2 cups whole milk (3.25% fat)
2 cloves garlic, minced
2 TBS all purpose flour
1 tsp. kosher salt
dash of ground nutmeg

1.  Preheat oven to 400 degrees F.  Thoroughly spray a 2 quart glass casserole dish ( or an 8 x 8" glass baking dish) with cooking spray.  

2.  In med sauce pan, combine the milk, garlic, flour, salt and nutmeg.  Whisk until combined.  Over med heat, cook until thickened, whisking often to avoid the mixture from sticking to the bottom of the pot.  Once slightly thick and hot (about 5 minutes or so), take off heat.  

3.  Arrange 1/2 the potato slices in bottom of prepared casserole dish.  Sprinkle with salt and pepper.  Dot with half the butter.  Sprinkle half the cheese on.  Pour half the of the milk mixture on top.  Repeat layer with remaining ingredients, except this time end with cheese instead of milk mixture.  

4.  Cover with foil and bake in oven for 30 minutes.  Remove foil, and bake for another 20 minutes until top is golden brown and potatoes are fork tender.  Remove from oven (it may look a little soupy on top...this will thicken as the casserole sits)  Let rest for 15 minutes before serving. 


 ---------------------------------------
The hardest thing about this dish is the baking time and the waiting time.  It comes together so easy and ends up looking pretty impressive!  I liked it both with the cream and without, but to be honest, there wasn't that big of a difference for me to add 5 more grams of fat and nearly 40 more calories per serving.  The whole milk works well and stands up to the heat of the oven without curdling, without sacrificing creaminess and taste. 

My husband requested that I make this dish next week.  I might do this instead of mashed potatoes!  I think it would be nice change up.  

I started my shopping yesterday for our Thanksgiving dinner.  I will definitely need to make another trip to the store next week, but was glad to get a good chunk of things bought and ready to go.  I have to admit, I forgot my list at home, so I was living on the wild side in the store...trying to remember all the things I needed.  I've been hosting Thanksgiving for many years though, so it wasn't all that hard.  I did forget a few things though. 

How about you?   Are you hosting Thanksgiving or going to someone's house and bringing a dish?  


Thursday, November 1, 2012

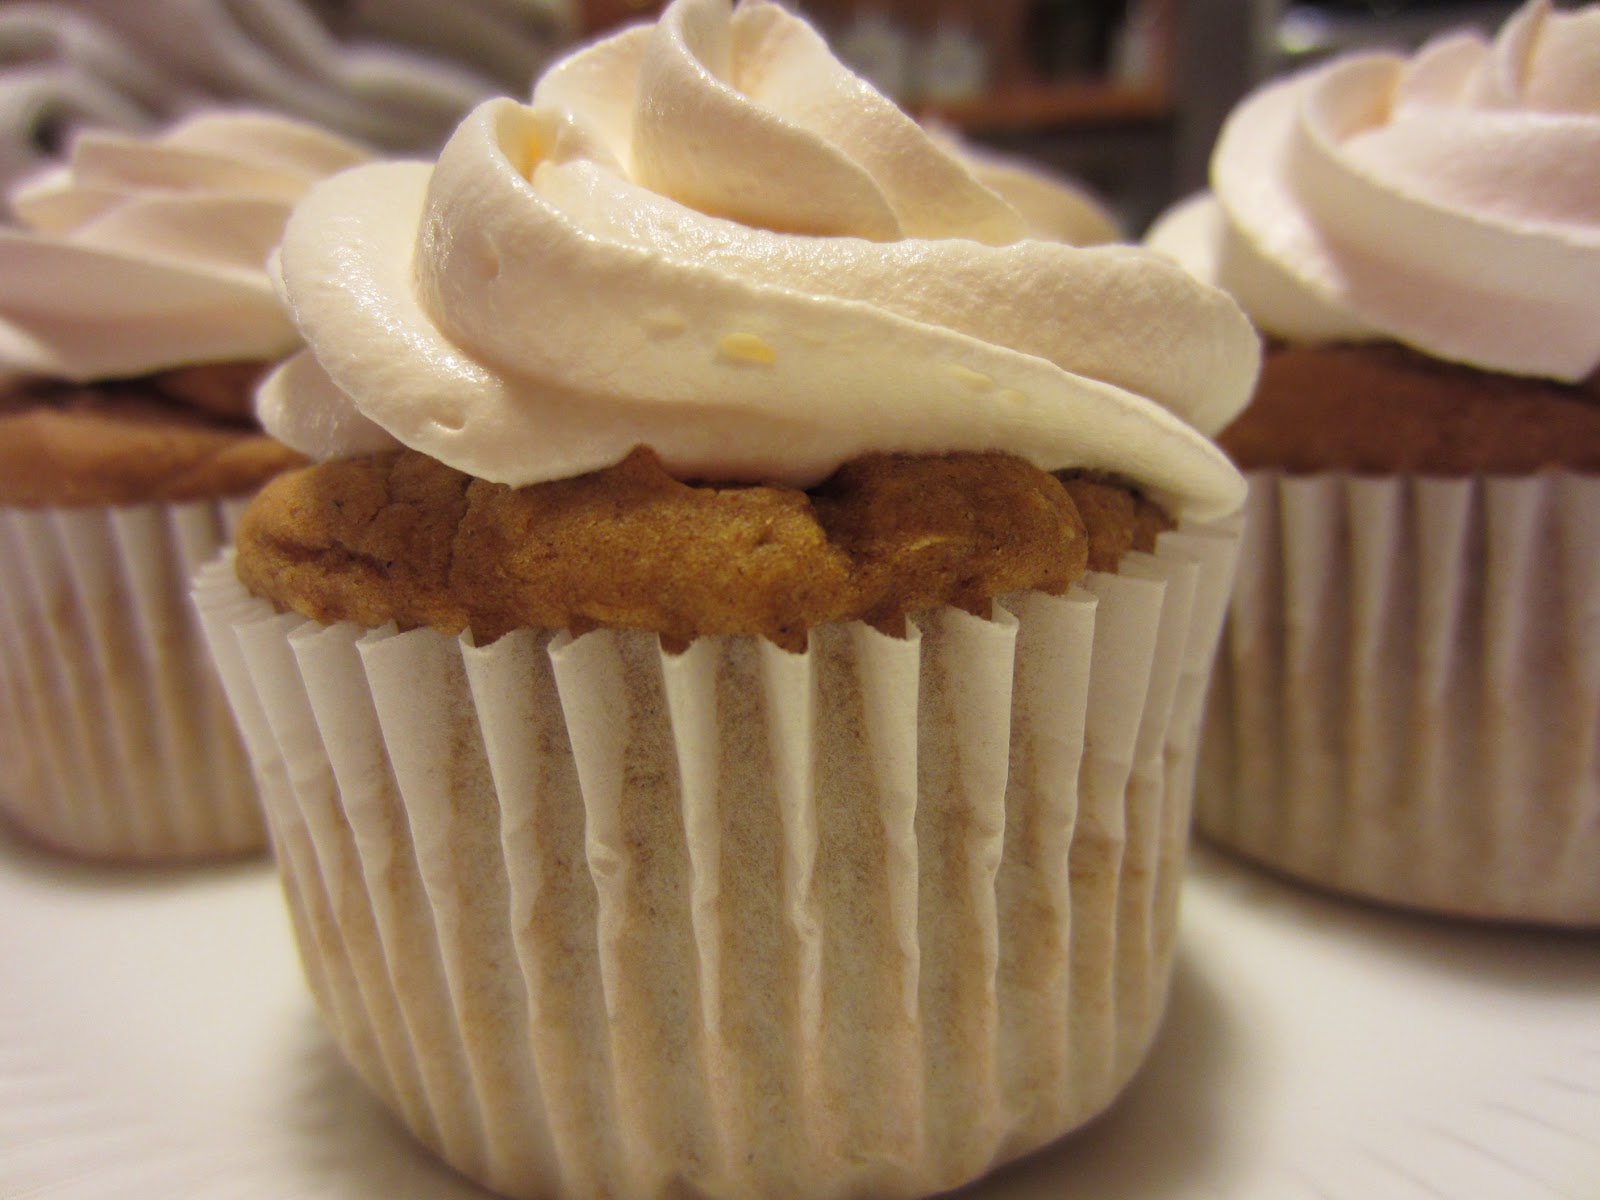
Lightened Up Pumpkin Spice Cupcakes with Cool Whip Cream Cheese Frosting

Fast, Easy and WW friendly. 

But let me warn you...these aren't light and fluffy cakes.  They are dense and thick...almost gooey brownie like...which I am still on the fence whether I like or not...but they taste wonderful and I am in love with the frosting...so I decided to share.  The cupcakes are made from a boxed spice cake mix, pumpkin puree, and pumpkin pie spice. 

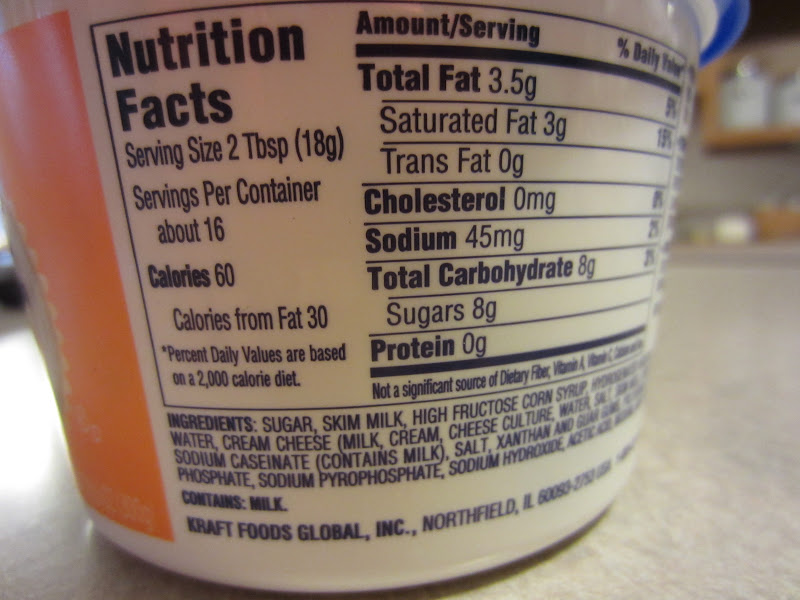
What I am really excited about is the frosting.  It's a new food find for me...and I have only seen it at one store I shop at.  It's Cool Whip Frosting, and it's available in cream cheese (pictured), chocolate, and vanilla.  I have sampled them all and they all taste quite good.  And the best part?  They are only 60 calories per 2 TBSP (2P+), which is about the amount of frosting pictured on the cupcake above.


Now I know it has a lot of ingredients in it that are less than healthy, but this is a once in awhile product.  You won't be eating this everyday (well, at least you shouldn't be eating this daily!)...and it is so much better than the canned stuff!  Lower in calories, fat and sugar...and it tastes better! 

This stuff is so new I can hardly find any product information on it.  That's why I haven't provided any links to follow.  They just don't exist.  

So how does it taste?  You can definitely taste the cool whip component in it.  It's light and fluffy, yet it has enough body to stand up to piping.  It has a richness to it, even though it's light.  You can definitely taste the vanilla in the vanilla flavor, the cocoa in the chocolate flavor, and the cream cheese in the cream cheese flavor, although the vanilla flavor and the cream cheese flavor are more subtle than the chocolate flavor .  Please note that I bought this product with my own money and the opinions expressed are mine.  I have not been compensated by Kraft in anyway.  

You can find this product in the freezer section, by the other cool whip products.  To use, you simply defrost. 

It's really hard to find a decent frosting that is low enough in calories to top lightened up cake recipes.  This one really fits the bill.  Plus, doesn't it look beautiful piped on top of these cupcakes?


Lightened Up Pumpkin Spice Cupcakes with Cool Whip Cream Cheese Frosting


Servings - 18     Serving Size - 1 cup cake with 2 TBS Cool Whip Cream Cheese Frosting   
Points Plus per serving - (WITHOUT frosting) 3 Points+,  (WITH frosting) 4 Points+

For Cupcakes WITHOUT frosting - Calories - 91.2,   Total Fat - 0.9g,   Carbs - 20.5g,   Protein - 1.2g,   Fiber - 0.2g  (3P+)
For Cupcakes WITH frosting - Calories - 151.2,   Total Fat - 4.4g,   Carbs - 28.5g,   Protein - 1.2g,   Fiber - 0.2g  (4P+) *don't ask me how, but this is just how the math turns out.  


1 - 15.25 oz. box of Spice Cake Mix ( I used Betty Crocker brand)
1 - 15 oz. can of 100% pure pumpkin puree
3/4 cup water
1 - 2 tsp. pumpkin pie spice
1- 10.6 oz. container of Cool Whip Frosting, Cream Cheese flavor (you won't use all of it)


1.  Preheat oven to 350 degrees F.  Line cupcake pan(s) with 18 liners or generously spray wells with cooking spray.  

2.  Combine cake mix, pumpkin puree, water and pumpkin pie spice.  With electric mixer on low, combine ingredients then turn up to med-high and beat for 2 minutes.  The batter will be thick.  Portion out the batter into the wells, filling each about 2/3 full to 3/4 full.  ( I used a scoop to put the batter into the wells...it's thick and this worked well)  

3.  Bake in oven for approx. 20-25 minutes.  This batter doesn't spread well.  It does raise a bit, but less than traditional cupcake batter, and the tops get a crackle appearance.  Cool on wire rack.  When completely cool, frost each one with 2 TBS of Cool Whip Frosting.  

-------------------------------------
Dense, almost pumpkin pie-like, texture to these cupcakes.  I've made chocolate cake with pumpkin puree before, but used a bundt pan to make an entire cake...which we really enjoyed.  Like I said, I am on the fence about the texture of these cupcakes, as I like my cupcakes light and fluffy.  But the pumpkin taste is most definitely there, unlike how it hides in chocolate cake.  Because I made my cupcakes small, and got 18 out of the mix, I was able to reduce the PP to 3P+ per cake, which is great!

The real star of these cupcakes is this wonderful frosting though!  I love this new for me food find.  And how crazy is it that you can eat a well frosted cupcake for 4P+??  Love that! 


Tuesday, May 1, 2012

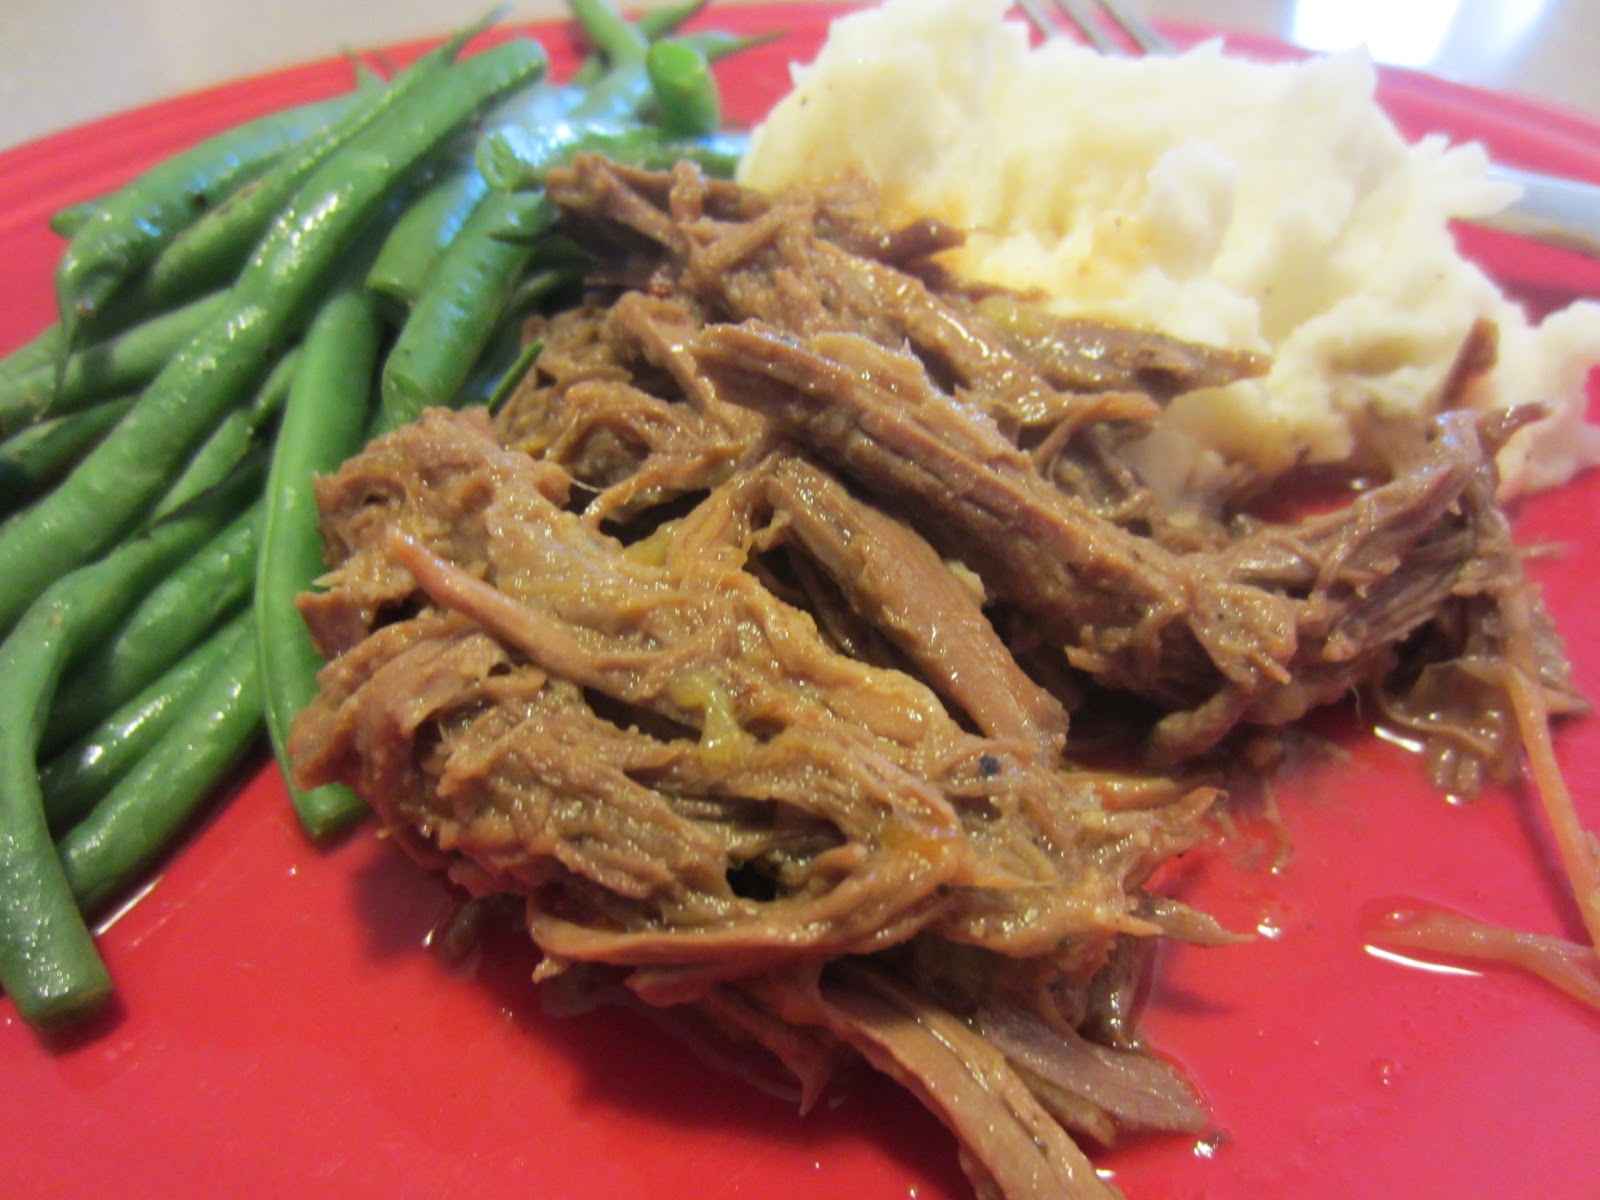
Crockpot Italian Roast Beef


Hands down, one of the easiest and tastiest crockpot meals I have ever made!  When Veronica of Veronica's Cornucopia had posted the recipe a while back and raved about the results...I knew I wanted to make it...but I had actually forgotten all about it, until she posted about it again, this past week.  Luckily, I had a small round roast ( about 3#, Veronica used a 5# roast) I wasn't sure what I was going to do with in the freezer.  I say I wasn't sure what I was going to do with it, because I actually bought it when it was on sale for a super low price and because the cut was round, I knew there was the possibility of it cooking up tough and dry. 

The only changes I made to her original recipe was to use freeze dried shallots and add a little ketchup at the end to the sauce.  ( I wanted a tomato presence in the sauce...so I went with ketchup)  Other than that, it was just a package of Good Seasons Italian dressing mix and a jar of mild banana peppers placed on top of the meat and braised for 8 hours on LOW.  The result was a tasty, moist,  fork tender roast which could be eaten as pictured above or put on some buns for a pulled beef sort of deal.  The banana peppers, for the most part, cook way down into the sauce...so you really don't get bits and pieces of peppers...just the flavor. 


With the ease of preparation and the delicious end result...this recipe is on it's way to becoming one of my all time favorites! 


Crockpot Italian Roast Beef
adapted from Veronica's Cornucopia


Servings - approx. 8   Serving size -  4 oz. cooked meat   Points Plus per Serving - 4 Points+
Calories - 172.2,   Total Fat - 4.4g,   Carb. - 4.5g,   Protein - 25.8g,   Fiber - 0g
(*since you use all the brine from the peppers and it becomes a sauce, I wasn't sure how to calculate, but I cannot imagine it adds much if anything calorie wise to the mix...if you want to err on the side of caution, give yourself another point+ for this dish to be sure)


Round Roast, approx. 2 - 3lbs.  ( Veronica used a 5lb roast, and this would yield more servings if you used it, but the serving size would remain the same)
1 - 12oz. jar of mild banana peppers 
1 envelope Good Season's Dry Italian Dressing mix
pepper, as you like
2 TBS dried shallots
1/4 cup ketchup

1.  Spray interior of crockpot with cooking spray.  Pepper roast as you like ( optional).  Put in roast, sprinkle with Italian dressing mix and shallots.  Pour entire jar ( brine and all) over the roast.  Cover and cook until fork tender, turning roast over halfway through cooking, approx. 8 - 10 hours on LOW.  

2.   Remove roast and shred with two forks.  Return meat to the crockpot with the juices and mix in the ketchup.  Serve as you like....as a main course or in a bun as a sandwich.  ( both ways are great!)  


-------------------------------

A total two thumbs up meal!  While I chose to eat mine as pictured above...my son put his on a bun.  Delicious either way! I will be making this roast again.  I love that it is so low in points and the brine from the peppers makes this super tender and moist.  


This post is being shared with:
Tastetastic Thursdays @ A Little Nosh

Wednesday, April 18, 2012

Meatless Philly Cheesesteaks (w/Seitan)


Seitan....have you ever heard of it?

Seitan....pronounced "say-tan", as I have found out, is flavored wheat gluten that is used to replace meat.  (So evil sounding!)  I am not, nor ever have been a vegan, but I like to experiment with meatless meals for my family now and then, and when I saw this recipe using seitan on none other than good old Dr. Oz, I was intrigued.  First off...could I find this seitan product at my local grocery (and would it be reasonably priced) and second, could I foul my picky, picky husband into eating a meatless meal....hmmmmmm?

Philly Cheesesteak is one of those notoriously high fat and calorie sandwiches I have all but taken entirely out of my diet.  A chance to bring this "fun" food back into my life without feeling guilty about it certainly had it's charm.  

I was surprised to find the seitan strips very easily in my local grocery.  They were located by the tofu and other vegan products.  They were a tad pricey, but not more than I would have spent on meat for the purpose of making this dish...so I decided to take the plunge.


Turning the box over this is what I saw:


And the nutritional stats were pretty good too!


The biggest lure to this product was the fact that it was void of saturated fat and had some fiber.  The downside would be if you are sensitive to wheat and wheat gluten.

But could it be a reasonable replacement to beef and chicken as the box claimed?

I opened the package and their was no odd smell.  ( I was prepared...ever made shiritaki noodles?  ew!  lol) It was packed in liquid which I drained off and then placed  the seitan on a paper towel until I was ready to add it to the recipe.  


Although I had bought the "strips", I still found them to be kind of big, so I ran a knife through them to cut them up more before I added them to the pan.

The rest of the recipe is no surprise...the normal sort of stuff you would find in a Philly cheese steak...onion, peppers, mushrooms, garlic and seasonings....all sauteed up until soft...


Add in the seitan to heat it up...


And then cover it with cheese! ( I used reduced fat mozzarella, NOT the vegan cheese the original recipe called for)  So my meal wasn't vegan, but it was still meatless. 


Finally, spooning the mixture into a bun of your choice...


The Verdict:

Pretty darn good!  Good enough to foul the picky husband into NOT knowing it was meatless! The texture is really similar to meat and the taste isn't bad at all.  It's not flavorless like tofu...but it's not a bad taste either. I served these on Pepperidge Farms 100% whole wheat soft hoagie rolls.  (the rolls were 4p+ each) All boys gave this meal a thumbs up.  I served it with the BEST Oven Baked Fries for some extra fun.  I would make this again.

I think this same recipe would also be great using chicken, if you didn't want to go the meatless route.  But sometimes...it's good to try something new...because you just never know!


Meatless Philly Cheesesteaks ( w/Seitan ) 
adapted from The Dr. Oz Show


Servings - 4   Serving Size - 1/4th of mixture   Points Plus per serving - 4 points+
( Nutritional information for filling only, bun NOT included)  Calories - 187.3,   Total Fat - 6.5g,   Carb. - 9.5g,   Protein - 21.8g,   Fiber - 2.6g


1 med onion, sliced
1 med red pepper, sliced
1 med green pepper, sliced
8 oz. fresh mushrooms, sliced
2 cloves garlic, minced
1- 12oz. package of seitan, drained and chopped
1 tsp Worcestershire sauce
salt and pepper, to taste
1 cup reduced fat mozzarella

1.  Spray a large nonstick skillet generously with cooking spray.  Add in onion, peppers, garlic and mushrooms.  Saute on med/high heat until veggies are tender.  Add in the seitan, Worcestershire sauce and salt and pepper. Heat through.  

2.  Take off heat.  Top with 1 cup of cheese and mix in a bit.  Let the cheese melt.  

3. Spoon into buns of your choice.  Enjoy! 

--------------------------------------

Like I have mentioned, we really enjoyed this meatless meal.  If you want a true vegan sandwich, you will need to use vegan Worcestershire sauce and vegan cheese.  I did not.  For the 8p+ I spent on this sandwich, it was totally worth it!  

Have you ever had Seitan?  How have you used it if you have?  


This recipe is being shared with:
Full Plate Thursdays @ Miz Helen's Country Cottage


Tuesday, April 17, 2012

Lightened Up Salisbury Steak


For a very, very long time, I have been on the look out for a GREAT Salisbury Steak recipe.  I've tried many, but none ever came close to what I think Salisbury steak should taste like.  Salisbury steak is a bit of nostalgia from my childhood, and well, don't laugh, but what I think it should mimic is the Salisbury Steaks from tv dinners.  There...hahah...I said it.  My mom was a single working mother and the truth is, as kids we ate a lot of tv dinners...you know the ones, in the divided up metal trays.  ( I am probably dating myself here, because obviously the metal trays were used during the pre-microwave years when we had to heat everything in the oven!) 

Today, I rarely succumb to processed foods.  But you can't take away those childhood memories that give us comfort..and yes, Salisbury steak dinners in the tv trays really is just that for me.  Although I will venture to guess, that the tv dinners of yesteryears probably weren't all that bad for you...they tended to rely on real ingredients unlike so many processed foods today. 

When I saw a recipe for Salisbury Steaks on My Bizzy Kitchen last week, and I saw that Biz raved about it, I knew I had to give it a try.  Her pictures made my mouth water! I was hoping I wouldn't be disappointed by yet another recipe that produced a glorified hamburger with gravy on top that was tough.  What I was looking for was a super tender beef patty with the distinct flavor I remembered from my childhood.  And guess what?  THIS IS THE RECIPE THAT DOES THAT!! 

I did adjust her recipe just a tad.  I used bread moistened with milk for the binder, added in shallots and left out the dijon mustard ( I actually just forgot to add it)...but I was really happy with the end result.   I also added finely chopped mushrooms to the meat to help keep it moist, tender and bring down the fat and calories of the final product.  The prepared horseradish sauce I used was Woeber's Reserve Smoky Horseradish Sauce.  I decided to use a ground sirloin with 10% fat as well.  I did this because I was bulking it up with the mushrooms anyway and the little extra fat helped keep the patties moist. 

While Biz made a gravy from a packet, I used Campell's Mushroom Gravy in a can.  1/4 cup serving is 1 point+. 


Don't forget to make a little divot in the center of the shaped patty to help keep it from puffing up while cooking.


This recipe is a keeper, especially if you were ever a fan of those Swanson TV dinners of the 70's!  The only thing this meal was missing was a little mini dessert!  lol


Lightened Up Salisbury Steak
adapted from MyBizzyKitchen


Servings - 6   Serving Size - 1 patty w/ 1/4 cup gravy   Points Plus per Serving - 4 Points+ for patty plus 1 Points+ for gravy
Nutrition Information for patty:   Calories - 174.1,   Total Fat - 8.7g,   Carb. - 4.5g,   Protein - 18.5g,   Fiber - 0.4g


1 pound ground sirloin ( 90/10)
8 oz. fresh sliced mushrooms, divided ( I buy them pre sliced cuz I'm lazy like that!)
2 slices of white bread ( I used Wonder Smart White)
1/4 cup skim milk
1 TBS dried shallots
1 egg, slightly beaten
1 tsp prepared horseradish sauce
1 tsp Worcestershire sauce
dash garlic powder
salt and pepper, as you like
2 cans of Campbell's Mushroom Gravy

1.  In a food processor, take 4 oz. of the mushrooms and finely chop.  Set aside.  Set aside the other 4 oz. of sliced mushrooms for the gravy.  

2.  In a large bowl, tear up the white bread slices ( you can leave the crust on ) into small pieces.  Add in the dried shallots and pour the milk over all.  Allow to sit for about 5 minutes or until the bread has absorbed most of the milk.  With a fork, mush the wet bread to form a paste.  

3.  Add in the ground sirloin, egg, horseradish sauce, garlic powder, salt and pepper and reserved finely chopped mushrooms.  Mix together.  Form into 6 patties, leaving a little indent in the center to prevent puffing when cooking.  

4.  Heat a large nonstick skillet that has been generously sprayed with cooking spray on high heat.  When hot, add in patties, but don't overcrowd the pan.  ( I cooked three at a time in two batches)  You want a nice brown crust on the outside.  Cook patties without disturbing them on one side, until the bottoms have a nice brown crust.  Flip and continue cooking all the way through.  ( Keep patties from first batch in warm oven while second batch is cooking)  

5.  In a med saucepan, saute the remaining sliced mushrooms over med heat with cooking spray.  When soft, add in the cans of gravy and heat through.  

6. Serve patties with gravy.  Mashed potatoes and peas make a great accompaniment!  

----------------------------------------

It's really funny how certain foods just bring back so many memories from our past...especially those from our childhood.  My whole family really enjoyed these Salisbury Steaks and you just can't beat the stats for home cooked beef comfort meal!  

The patties were super tender and had a nice flavor to them.  I will definitely be making this dinner for us again! 

How about you?  Do you have any foods or meals from your childhood that just scream comfort?  


>