Renee's Kitchen Adventures

Sunday, January 16, 2011

Blueberry Buttermilk Scones

The scone is a small British quick bread (or cake if recipe includes sugar) of Scottish origin.  Sort of a marriage between a muffin and a biscuit.  This recipe makes a tender scone, dotted with delicious blueberries.  A great breakfast bread or treat with a cup of coffee or tea in the afternoon.  These are perfect eaten plain, but you could put some whipped butter or jam on them if you desire.  When cutting in the butter, be sure to use COLD butter and don't worry about getting it too well incorporated.  Generally, the less this dough is handled, the more tender the end product will be. Don't skip the turbinado sugar topping!  It makes the most wonderful, crispy sweet topping.... I love this scone recipe, and will be working on variations in the future!


Blueberry Buttermilk Scones 
adapted from WW New Complete Cookbook

Ingredients:
1 1/2 cups all purpose flour
1/2 cup old fashioned oats
1/4 cup ground golden flaxseed
1/4 cup packed brown sugar
1 1/2 tsp. baking powder
1/2 tsp. baking soda
1/2 tsp. salt
4 TBS. COLD unsalted butter, cut into pieces
1 cup fresh or frozen blueberries
3/4 cup 1% buttermilk
1/4 cup eggbeaters ( or 1 egg white ) 
1 TBS. turbinado ( raw) sugar

Directions: 
1.  Preheat oven to 375 degrees F.  Line baking sheet with parchment paper ( easiest) or spray baking sheet with cooking spray.  

2.  Whisk together flour, oats, flaxseed, brown sugar, baking powder, baking soda and salt in large bowl.  With a pastry blender or fork, cut in pieces of butter to create a coarse meal.   Don't worry to wok it too much...larger chunks of butter are good...they will provide a "flakiness" to the scones.  Gently stir in blueberries. 


3.  Measure out the buttermilk, and then take one TBS out and set aside.  Add the eggbeaters to the remaining buttermilk and stir to combine.  Add the buttermilk/eggbeater mixture to the dry ingredients and stir gently with a fork until just combined.  With hands, knead dough about 2 times while in the bowl to finish combining ingredients.  Again, it doesn't have to be perfect...and the less you work the dough the better.  

4.  Divide the dough in half and form on the cookie sheet two 6 " rounds.  With a knife, cut the rounds into six pieces each...but don't separate cuts.  Brush scones with reserved buttermilk and sprinkle with the turbinado sugar.  
Ready for the oven


5.  Bake until toothpick inserted into middle comes out clean, or about 15 to 20 minutes.  Remove from oven, and slide the parchment paper onto a metal rack to cool.  ( or if not using parchment, let pan cook on rack for about 5 min, then remove scones to rack to cool.) Serve warm or at room temperature.

Yield:  1 doz.
Prep Time: 00 hrs. 10 min.
Cook Time: 00 hrs. 20 min.
Total Time: 30 min.

Servings - 12   Serving size - 1 scone or 1/12 of recipe   Points Plus per serving - 4 points+
Calories ( per svg) - 152,  Total Fat - 6g,   Carb. - 23g,   Protein - 4g,   Fiber - 3g

PRINTABLE RECIPE

Looking for more recipes that use blueberries?  Try this!
Blueberry Cheesecake Squares from The Tip Toe Fairy

Thursday, January 13, 2011

Crockpot Tuscan Sausage and Bean Soup

Tis the season for crockpot meals! :) This soup is easy and really, really tasty.  It originally comes from Weight Watchers New Complete Cookbook.  It's written to be cooked in a crockpot, but there is no reason you couldn't make it stovetop.  This is my first time cooking with kale...I thought about subbing the kale for spinach ( which would be a fine substitute) but then decided to broaden my horizons and just pick up a bunch of kale and give it a try.  Besides, kale is one of those winter vegetables that is in season and very reasonably priced right now.  I LOVED it with the kale.  Kale is considered to be a highly nutritious vegetable with powerful antioxidant properties and is very high in beta carotene, vitamin K, vitamin C, lutein, zeaxanthin, and reasonably rich in calcium.  Since kale is a member of the cabbage family and has a thick stem,  you will need cut it out before chopping it to add to the soup.

This soup calls for 1/2 cup of dry red wine, which I highly encourage you to use, as it imparts the most excellent flavor to the broth.  This recipe also uses canned beans...notorious for being high in sodium.  To reduce the amount of sodium in them, be sure to rinse and drain them before adding to the soup.   Next time, I will be making this soup on the stove, so I can double the recipe and have plenty of leftover for lunches during the week...but made in the crockpot it yields six generous ( 1 1/2 cup) servings at 6 points+ each.  My entire family loved this soup and so will you!


Crockpot Tuscan Sausage and Bean Soup adapted from Weight Watchers New Complete Cookbook

Servings - 6   Servings size - approx. 1 1/2 cups or 1/6th of recipe  Points plus per servings - 6 points+
Calories - 241,   Total Fat - 5g,   Carb., - 31g,  Protein - 19g  Fiber - 8g

12 oz. turkey smoked sausage ( such as Hillshire Farms brand), sliced 
2 cloves garlic, rough chopped
1 onion, diced
2 large carrots, diced
2 large celery stalks, diced
1/2 cup cauliflower florets, chopped ( optional, I added because I wanted to use them up)
1/2 medium bunch kale, stems removed, and leaves chopped ( about 4 cups)
3 cups fat free, low sodium chicken broth
2 cans ( 15.5 oz each) of cannellini beans, rinsed and drained
One (14.5 oz.) can of diced tomatoes, with Italian seasonings
1/2 cup dry red wine ( or water)
1 tsp. dried basil
salt and pepper, to taste*
juice of half a lemon

1.  In a slow cooker, combine all of the ingredients.  Stir to combine.  Cover and cook for 8 hours on low or 4 hours on high, until the vegetables are tender.  ( If you choose to cook on stove top, saute the carrots, onion, garlic, celery and cauliflower ( if using) in a little cooking spray in dutch oven or large stock pot for about 5 min.  Add the basil and cook for another minute or so.  Then add the rest of the ingredients, bring to boil, and allow to simmer, slightly covered, until vegetables are tender...about an hour or so)

2. Squeeze juice of half a lemon into the soup and stir.  Enjoy. 

*this recipe does not require much salt, if any...the sausage, the beans and the canned tomatoes add quite a bit of salt to the recipe on their own.  I would advise you to taste before you salt. 


so easy....just dump into crockpot and turn on!!


Wednesday, January 12, 2011

Crockpot Steel Cut Oats with Peaches

What could be better on a cold (and snowy) morning, then to wake up to a delicious, warm,  ready to serve breakfast that smells wonderful?  Not much...

When I saw this recipe posted by Danica on Friends for Weight Loss the other day, I knew I wanted to try it.  What I didn't know, was how happy my family was going to be to be able to scoop themselves out a nice warm breakfast as they each got up...at different times of the morning.  My sons and husband added sugar to their servings...I opted for some splenda.  This is a really easy way to get everyone to eat a healthy breakfast before they go out the door to work or school...and it makes plenty to heat up another day!  Be sure to use REAL steel cut oats ( NOT the quick cooking steel cut oats, nor the old fashioned oats...they will not stand up to the extended cooking time)  I used frozen peaches as the original recipe suggested, but the beauty of this recipe is that you can use virtually ANY frozen fruit to make your own masterpiece! 


Crockpot Steel Cut Oats with Peaches adapted from Friends for Weightloss

Servings - 12   Serving size - approx. one cup of cooked oats  Points Plus per serving - 4 points+
Calories - 164.4,   Total Fat - 2.6g,   Carb. - 33.3g,   Protein - 6.4g,  Fiber - 5.1g

3 cups Steel Cut Oats
10 cups water
2 cinnamon sticks ( or 2 tbs. ground cinnamon)
1 TBS. pure vanilla extract
pinch of salt
1 lb. frozen sliced peaches ( or frozen fruit(s) of your choice)
  1. Spray the inside of your crock pot with nonstick spray.  MUST DO or you will have a sticky mess to deal with!  
  2. Combine all ingredients in the crockpot and cook on low for 8 - 10 hours.  ( I cooked mine from 10pm to 7am and the oats were perfect.  I turned the pot off, but they kept warm for an hour or so afterward)
  3. Remove cinnamon sticks and stir well. 
PRINTABLE RECIPE

Steel cut oats have become more popular and are much easier to find than they used to be.  Quaker even makes them now.

Want More?  


Tuesday, January 11, 2011

Buttermilk and Herb Stuffing Muffins

Let me start off this post with a link for you.... Nicole, a fellow blogger and a Registered Dietitian, wrote an excellent post about Weight Watchers new PP program...her thoughts on it and WW in general.  If you are a WW, you might be interested in reading it to get a REAL LIFE RD's opinion on this program.

And now...on to the recipe....While sitting in my son's orthodontist office,  as I was paging through the November 2010 issue of Health Magazine ( this office has the most awesome up-to-date magazines!), I came across a recipe that intrigued me:  Buttermilk and Herb Stuffing Muffins.  Hmmmm....stuffing, in a muffin form, that's healthy?....I quickly had them make me a copy of the page and put in in my "to make" stack of recipes I have on my desk.  Last week I got around to making them.  I roasted a turkey breast and steamed up some green beans to go along side the "stuffing muffins."  I was happy to see once I worked up the numbers, each generously sized "muffin" comes in at 7 points+.  All the flavors are there that you would expect from a stuffing, but there is also a tang from the buttermilk which is subtle, but works well with the other flavors.  And the best part about these stuffing muffins, is that they can be made ahead and then reheated in a 350 degree F oven  for about 15 min. before serving....

Ready to be baked.  An ice cream scoop made quick work of portioning out each "muffin."

They do hold together like traditional muffins, but I would suggest eating them with a fork!

Buttermilk and Herb Stuffing Muffins from Health Magazine, November 2010


Servings - 12   Serving size - 1 "muffin"   Points plus per serving - 7 points+
Calories - 265,   Total Fat - 8g,   Carb. - 40g,   Protein - 9g,   Fiber - 4g

Cooking spray
4 tablespoons unsalted butter
2 medium red onions, chopped (4 cups)
3 thinly sliced celery stalks
1 teaspoon dried rosemary, crushed
1/2 teaspoon dried rubbed sage
1/2 teaspoon dried thyme
1/2 teaspoon freshly ground black pepper
1 (8-ounce) package mushrooms, coarsely chopped (about 3 1/2 cups)
1 cup lower-sodium chicken broth
1 (12- to 14-ounce) package country-style cubed with white and whole-wheat bread) stuffing (such as Pepperidge Farm)
1 cup low-fat buttermilk (1%)
2 large eggs

1. Coat a 12-cup muffin tin with cooking spray; set aside.

2. Heat butter in a 4- to 5-quart pot over medium heat until melted; add onion and next 5 ingredients (through pepper). Cook until softened (about 5 minutes), stirring occasionally. Add mushrooms; cook over medium-high heat until mushrooms are tender and liquid evaporates (about 5 minutes), stirring well. Add broth; simmer.

3. Preheat oven to 425°. Remove pot from heat; stir in remaining ingredients with a fork. Cover and let stand 5 minutes. Spoon stuffing mixture into 10 cups of prepared muffin tin in mounds( I got 12 easily out of the mixture); bake in middle of oven until golden on top (about 25 minutes). Let cool in oven at least 15 minutes; remove from tin.

PRINTABLE RECIPE

Monday, January 10, 2011

Potato-Leek Frittata

Frittata is an egg-based dish similar to an omelette or quiche.  This versatile frittata recipe can be made for breakfast, lunch or dinner, or makes a great snack. It can be served warm or room temperature.  It's made with leeks, a vegetable with a flavor similar to onion, but much milder.  If you don't have or don't want to use leeks, you could substitute chopped onion.  If you do use leeks, be sure to use the white and light green part only, slice it, and give it a good rinse in a bowl of cool water to loosen any sand that may be hiding between the layers.

I found this recipe in the Jan/Feb issue of Everyday Food, and even though it was written as a "lightened up" recipe, I lightened it even more by reducing the number of whole eggs and using fat free ricotta cheese.  By doing these simple substitutions, I reduced the points plus value from 6 points+ to 3 points+!  This recipe is easy and delicious, and if you don't own a nonstick skillet with a ovenproof handle, just wrap the handle in foil, before putting it into the oven.


Potato-Leek Frittata adapted from Everyday Food

Servings - 6   Serving size - 1/6th of frittata   Points Plus per serving - 3 points+
Calories - 108.9,  Total Fat - 3.5g,  Carb. - 10.3g,   Protein - 10g,   Fiber - 1g

Cooking spray ( I used olive oil from my misto)
1 leek ( white and light green parts only, halved lengthwise and rinsed well, and thinly sliced, 1 cup)
2 cups of frozen hash brown potatoes, thawed
4 large eggs
4 egg whites
1/2 cup fat free ricotta cheese
salt and pepper, to taste

1.  Spray a 10 inch non stick pan with cooking spray and heat on med.  Add leeks and potatoes.  Season with salt and pepper.  Sauté about 5 - 7 minutes to soften leeks and warm potatoes, stirring frequently.  ( if you notice the mixture starting to brown too much, add a bit of water to finish sauté).  


2.  If handle of skillet is not ovenproof, wrap in aluminum foil.  Preheat oven to 425 degrees F.

3.  In a med bowl, mix eggs and ricotta cheese.  Add salt and pepper as desired to egg mixture.

4.  Pour egg mixture evenly over the sauteed potato leek mixture, and allow to cook on stove top, undisturbed, until edges are set, about 2 minutes.  Transfer skillet to oven and bake until top of frittata is just set, 10 - 13 minutes.  ( The frittata will appear to be mostly liquid on top when you transfer it to the oven, but as long as the edges are set, the eggs will finish cooking evenly.)


5.  Invert frittata onto a platter and cut into 6 wedges.  Serve warm or at room temperature.


Thursday, January 6, 2011

WW Dark Chocolate Cake

I want to give a shot out to a wonderful WW support group I joined a few weeks ago...it's new...and started up by Danica of Danica's Daily and it's called Friends for Weight Loss.  It is a wonderful support group full of great information, and it's free!  Consider joining it!   Danica posted a link to the new FREE Points Plus Power Foods Favorites Down-loadable Cookbook!  ( click to download your very own copy!) on this site and as I quickly printed off my copy, I noticed, on the last page, is the very cake I made on Thursday afternoon!!! 

WW Dark Chocolate Cake ( click for the recipe) is featured in this handy little cookbook, and also on WW online featured recipes this week.  The thing about this cake that caught my eye was that it was made with SAUERKRAUT!  WHAT???  (yes, sauerkraut).  It really came out wonderful.  The recipe uses no eggs.  It was moist, with a deep rich chocolate flavor...and the best thing is...you can't even tell there is sauerkraut in it.  Sauerkraut is rich in vitamin C and adds a wonderful moistness to this cake. My house smelled divine as it baked!!!  Don't be afraid...try it...I guarantee you will love it!

warm from the oven.  Let it cool in the bundt pan for 10 min or so before inverting it onto a serving platter.


I dusted the cake with powdered sugar once it was cooled.  The cake serves 14 and each slice is 6 points+.

combine all dry ingredients in a large mixing bowl with whisk

My mini food processor made fast work pureeing the sauerkraut.  Be sure to add a TBS or two of water when you puree. Looks a bit like applesauce when it's done. 


My 13 year old sons slice....with a dollop of ff Greek yogurt that has been sweetened with a bit of brown sugar!  He loved it! and he couldn't guess the secret ingredient!

Egg Sandwich with Dijonnaise

I recently discovered a new use for a terrific product...Hellmann's Dijonnaise.  ( or Best Foods for those of you on the west coast ).  This is a product I keep regularly in my fridge.  I am not a hug fan of mustard...give me a ton of mayo to slather on things, and I am a happy girl....but mayo is very costly WW speaking...so ever since I read about Dijonnaise on Hungry Girl, I decided it was worth trying. One TBS. of dijonnaise is ZERO points+.   This week, I decided to use it, instead of a butter spread or spray on my egg sandwich.  OMG...I was instantly in heaven!  The tang of the dijonnaise with the gooey egg middle is remarkable.  When I use Nickels light 35 mulitgrain bread,( one point+ per slice)  this sandwich comes in at 4 points+.  Today I added a banana on the side for a very satisfying breakfast.  I encourage you to give your taste buds a treat and try this combo.   I like the egg to ooze out and get messy, so I cook my egg over-easy, but if runny yolks aren't your thing, you could cook the egg until the middle is hard!   This would also make a terrific lunch as well! 


Egg Sandwich with Dijonnaise

Servings - one sandwich    Serving size - entire sandwich   Points+ per svg - 4 points+
Calories - 147,  Total Fat - 5.5g,   Carb. - 16.4g,    Protein - 9.3g   Fiber - 3g

I large egg
2 slices of Nickels light 35 mulitgrain bread
1 TBS. Hellmann's Dijonnaise Creamy dijon spread

1.  Cook egg in nonstick fry pan coated with cooking spray to your desired doneness. 
2.  Toast two slices of the bread and spread the dijonnaise on each slice.  
3.  Assemble egg sandwich.  Enjoy!

Mine is almost empty!   I need to pick up MORE!

Monday, January 3, 2011

The Great Pasta Question and Lemony Chicken and Vegetable Pasta

I hope everyone had a good New Year celebration...mine was very low key...an evening spent at home watching movies on Netflix...lol  The tree and the holiday decorations are now all down, and I am ready to get back into a routine, one which includes a more healthy diet!! 

Everyone that does WW knows what the point values for dry pasta are, right?  Of course we do...regular pasta, 2 oz. dry is 5 points+ and whole wheat pasta, 2 oz. dry is 4 points+. But really, who only cooks 2 dry oz. of pasta at one time?  I know I don't.  I will cook a pound of pasta for my family, and then weigh out my portion once the whole pound is cooked...I don't cook 2 oz. separate.  So what does 2 oz. of dry pasta weigh once it's cooked??  I have searched and searched for an answer to this question...and finally today, I decided to do a little experimentation.  First, I weighed out EXACTLY 2 oz. of dry pasta.  (Twice, because I used regular penne type pasta and whole wheat spaghetti type pasta )

dry penne weighed out ( minus the bowl )

2 oz. uncooked whole wheat spaghetti


I cooked both pastas al dente according to package directions separately and then reweighed each.  Here is what I got:

Cooked penne ( minus the bowl )


cooked whole wheat spaghetti ( minus the bowl ) 

As you can see, the cooked pasta weighs a little more than two times the dry.  I believe it would be safe to say, if you measure out 4 oz. of cooked pasta, it would have the same amount of points as 2 oz. dry.  It didn't seem to make a difference in the shape or the composition of the pasta as to the final weight.  Mystery solved!  :) 

And now what to do with this perfectly cooked pasta?  How about a nice, light lemony chicken and vegetable pasta dish? I made this dish for lunch, and it serves one..but you could easily adjust the measurements to make a dish to serve four to six or make this into a two serving recipe for half the points!  You could also leave the chicken out for a few less points or use whatever zero point vegetables you like.


Lemony Chicken and Vegetable Pasta


Servings - 1  huge serving  Serving size - whole recipe   Points plus per serving - 10 points+ 
Calories - 395.2,  Total Fat - 8.7g,  Carb. - 56.7g,  Protein - 25.8g,  7.6g

2 oz. dry penne pasta ( cooked according to package directions)
2 oz. cooked chicken breast, diced (warm)
1 cup fresh broccoli florets
1/2 cup baby carrots
1/2 cup red pepper, sliced
1 clove garlic, minced
1 TBS. lemon zest
juice of half a lemon
salt and pepper, to taste
1 TBS. Parmesan cheese, shredded

1.  Cook the broccoli, baby carrots, and red pepper until crisp tender.  ( I used the microwave )  

2. In a small saucepan, melt the brummel and brown spread.  Add the garlic and the lemon zest.  Cook until the garlic gets fragrant.  Take off heat, and add the lemon juice.  

3.  In a small bowl, combine the cooked pasta, chicken, and cooked vegetables. Pour the garlic lemon mixture over and coat evenly.  Salt and pepper to taste.  Sprinkle on cheese.  Enjoy!  

Wednesday, December 29, 2010

Homemade Cinnamon Rolls


This easy-to-make, Homemade Cinnamon Rolls is a recipe that needs to get on your menu pronto! Even the novice baker can pull this one off! This cinnamon roll recipe produces sweet, soft and tender rolls, covered in delectable cream cheese icing.


Tuesday, December 28, 2010

Glazed Carrots and Parsnips

I hope everyone had a wonderful holiday....and Santa brought you good things!  I got the fiesta ware I wanted from hubby...in a beautiful red color. I got a beautiful pasta serving set from Williams Sonoma from my mom and dad I also got some new cookbooks ( Ina's new one being one of them) and some warm boots for the winter.  Now I really don't have an excuse for not walking outside for exercise!  And my mom came home from the hospital on Christmas eve, and is doing better!  ( Best present! :)

Christmas eve, I spent the day cooking....I made my Make over Mac and Cheese, but used Gruyere cheese and reduced fat sharp cheddar...I made pierogies, coleslaw, my stuffed mushrooms, and took a loaf of bread and a plate of cookies to my husband's family's celebration.  On Christmas morning, I served Gina from Skinnytaste's, Lightened Up Creme Brulee French Toast...that was just spectacular.  I also served a stratta and some fruit.  During the week, I made 6 loaves of Challah bread....gave most away and saved one for the French toast. 

The recipe for the Challah bread can be found here, on the King Arthur Flour site.  I did use the KAF bread flour, which never disappoints!  Then, on Christmas day, we went to my brother's house, where my sister in law prepared a delicious roasted beef tenderloin.  I brought a salad, but also decided to bring Glazed Carrots and Parsnips.  They were delicious.  If you have never given parsnips a try, give this recipe a go...you won't be disappointed.  It's the perfect combination of sweet and savory.


**I calculated the nutritional information and used that to arrive at the pointsplus value...I also used the WW recipe builder...both which gave me a pointplus value of 3 per serving....however, this is one of those "gray areas" in the new plan, because if you decided to manually calculate the point value by giving the vegetables a value of zero, you get 1 points plus per serving.  I was told by WW, that which way you decide to calculate is up to you.  If you are using the fruits and vegetables in a recipe, and giving them a value of zero, and are achieving desired results on the program, then you can do it that way, but if you find you aren't, then you can add the values in the calculations ( as I did in the recipe builder and the nutritional information)  Confusing, I know.  But it is what it is....so I give you Glazed Carrots and Parsnips with a pointsplus value of 3 or 1 per serving.  (depending how you choose to calculate it )

Glazed Carrots and Parsnips


Servings - approx. 6   Serving size - 1/6th of recipe ( approx. 3/4 cup )  Points Plus per serving - **3 points+ with recipe builder and nutritional information and 1 points+ when vegetables are given a zero value ( see above for explanation)
Calories - 131.2,  Total Fat - 2.1g,  Carb. - 27.9g,  Protein - 2.2g,  Fiber - 5.7g

3 - 4 large carrots, peeled and diced
3 - 4 large parsnips, peeled and diced
1 cup onion, diced
salt and pepper, to taste
2 TBS. light spread, such as Brummel and Brown
1 TBS. honey
1/2 tsp. dried thyme

1.  Cook the carrots and the parsnips until crisp tender.( I cook mine in the microwave, and admit, I am a bit spoiled, as I have a fresh/frozen vegetable button on my sensor microwave...which cooks them perfectly every time, without me worrying about how long to put them in for.  If you do not have this convenience, then you can steam them over boiling water in a steam basket, or steam them in the microwave in either a zip lock steam bag or even a covered glass casserole.  Lastly, you could cook them in some water...but I wouldn't not recommend this method, as it does leach out some of the vitamins and the flavors. )

2.  In a large skillet, melt the spread.  Add the onion, and saute until tender, approx. 5 minutes.  Add the cooked carrots and parsnips, honey, salt and pepper and thyme...stir to coat evenly.  Serve and enjoy. 


Challah Breads

Wednesday, December 22, 2010

Ultimate Ginger Pecan Cookies

Just when you thought the baking was all wrapped up for the holidays, a recipe comes along that is a MUST TRY....this recipe is one of those.  This is my FAVORITE ginger cookie ever!  It is Ina Garten's Ultimate Ginger Cookie recipe with the addition of chopped pecans.  The chopped pecans compliment the spiciness of the cookie beautifully.  The outside of the cookie is crisp, with a chewy inside.  If you are done with ( or haven't started yet ) your Christmas baking, I strongly encourage you to add this cookie to your baking list!


Ultimate Ginger Pecan Cookies adapted from Ina Garten

Servings - approx. 3 doz. cookies   Serving size - 1 cookie   Pointsplus per svg  -  3 points+
Calories - 100.9,   Total Fat - 2.9g,  Carb. - 20.2,  Protein - 1.1g,  Fiber - 0.4g

2 1/4 cups all purpose flour
1 tsp. baking soda
2 tsp. ground cinnamon
1 1/2 tsp. ground cloves
1/2 tsp. ground nutmeg
1/2 tsp. ground ginger
1/4 tsp. kosher salt
1 cup brown sugar, lightly packed
1/4 cup canola oil
1/3 cup unsulfured molasses
1 large egg
1/2 cup chopped crystallized ginger
1/2 cup chopped pecans
granulated sugar, for dipping cookies in

1.  Preheat overn to 350 degrees F.   Line two sheet cookie sheets with parchment paper.  

2.  In large bowl, whisk together the flour, baking soda, spices and salt until combined.  In the bowl of an electric mixer fitted with the paddle attachment, mix the sugar, oil, and molasses for 5 minutes on med speed.  Turn the mixer to low, and add the egg.  Beat for an additional 1 minute.  Scrape the bowl down, and beat another minute.  With mixer still on low, slowly add the dry ingredients to the wet.  Mix on med speed for 2 minutes.  ( if mixture seems dry at this point, add a few tsp. of water just until it clumps together...sometimes I need to do this, sometimes I don't)  

3.  Add the crystallized ginger and the pecans and mix until just combined. 

4.  Scoop out about a TBS of dough, and form into a ball then flatten slightly.  Dip each side into granulated sugar, then place on parchment lined baking sheet.  

5.  Bake for exactly 13 minutes.  Remove from oven and allow to sit on baking sheet for 1 to 2 minutes.  Transfer to wire rack to cool completely.  


Tuesday, December 21, 2010

Apricot Chicken

I happened to catch an episode of 30 Minute Meals featuring Rachel Ray the other day, and saw her making Apricot Chicken.  It looked and sounded great, but a giant fan of RR I am not.  Sometimes her dishes are just....well...."out there" for my liking.  But this one sounded good, and I happened to have all the ingredients on hand, so tonight I gave it a go for dinner.  It was really pretty darn good!  And as a bonus, it was quick and easy.  I served it with steamed broccoli and brown rice for a really satisfying dinner for a total of 9 points plus.  The chicken is 6 points plus and a half of a cup of brown rice is 3 points plus and the broccoli is ZERO points, of course!  I tweaked the preparation and the ingredients just slightly from the original recipe and was happy with the results.

Oh, I almost forgot...it seems my very favorite kitchen gadget has been showing up all over the place!  MISTO....seems that Martha Stewart is selling one at Macy's now and believe it or not, I saw them at my grocery store last week!  If you don't own a misto, it's not too late to put it on your list to Santa.

Apricot Chicken adapted from Rachel Ray

Servings - 6   Serving size - 1/6th of recipe  Points Plus per svg - 6 points+
Calories - 259.8,  Total Fat - 2.1g,  Carb. - 23g,  Protein - 35.9g,  Fiber - 1.3g

2 pounds boneless, skinless chicken breasts, cut into 1 - 2" pieces
cooking spray or misto
salt and pepper, to taste
1 cup onion, diced
2 TBS. cider vinegar
12 dried pitted apricots, chopped
2 cups fat free, low sodium chicken broth
1/2 cup apricot all fruit spread


1.  Heat a large nonstick skillet with cooking spray.  Add chicken pieces and brown on both sides.  Approx 5 minutes each side.  Don't over crowd pan, do this in batches if needed.  Remove chicken to bowl in warm ( 200- 250 degree F) oven when browned.  

Lovely browning going on.  Just let them be and they will do their thing! 

2.  To make sauce, while browned chicken is in oven, using same pan, spray with a bit of cooking spray and add onions.  Saute for about 5 minutes.  Add vinegar and allow to bubble and then evaporate.  Add dried apricots and chicken broth.  Allow to come to boil.  Once boiling, add fruit spread and mix to combine.  Cover pan and reduce heat and simmer for 10 -15 minutes.

3.  Add reserved chicken from oven and the juices that have accumulated.  Mix to combine.  Allow to heat for another 5 minutes.  Serve warm over rice, if desired.

PRINTABLE RECIPE

Monday, December 20, 2010

Make Over Baked Mac and Cheese

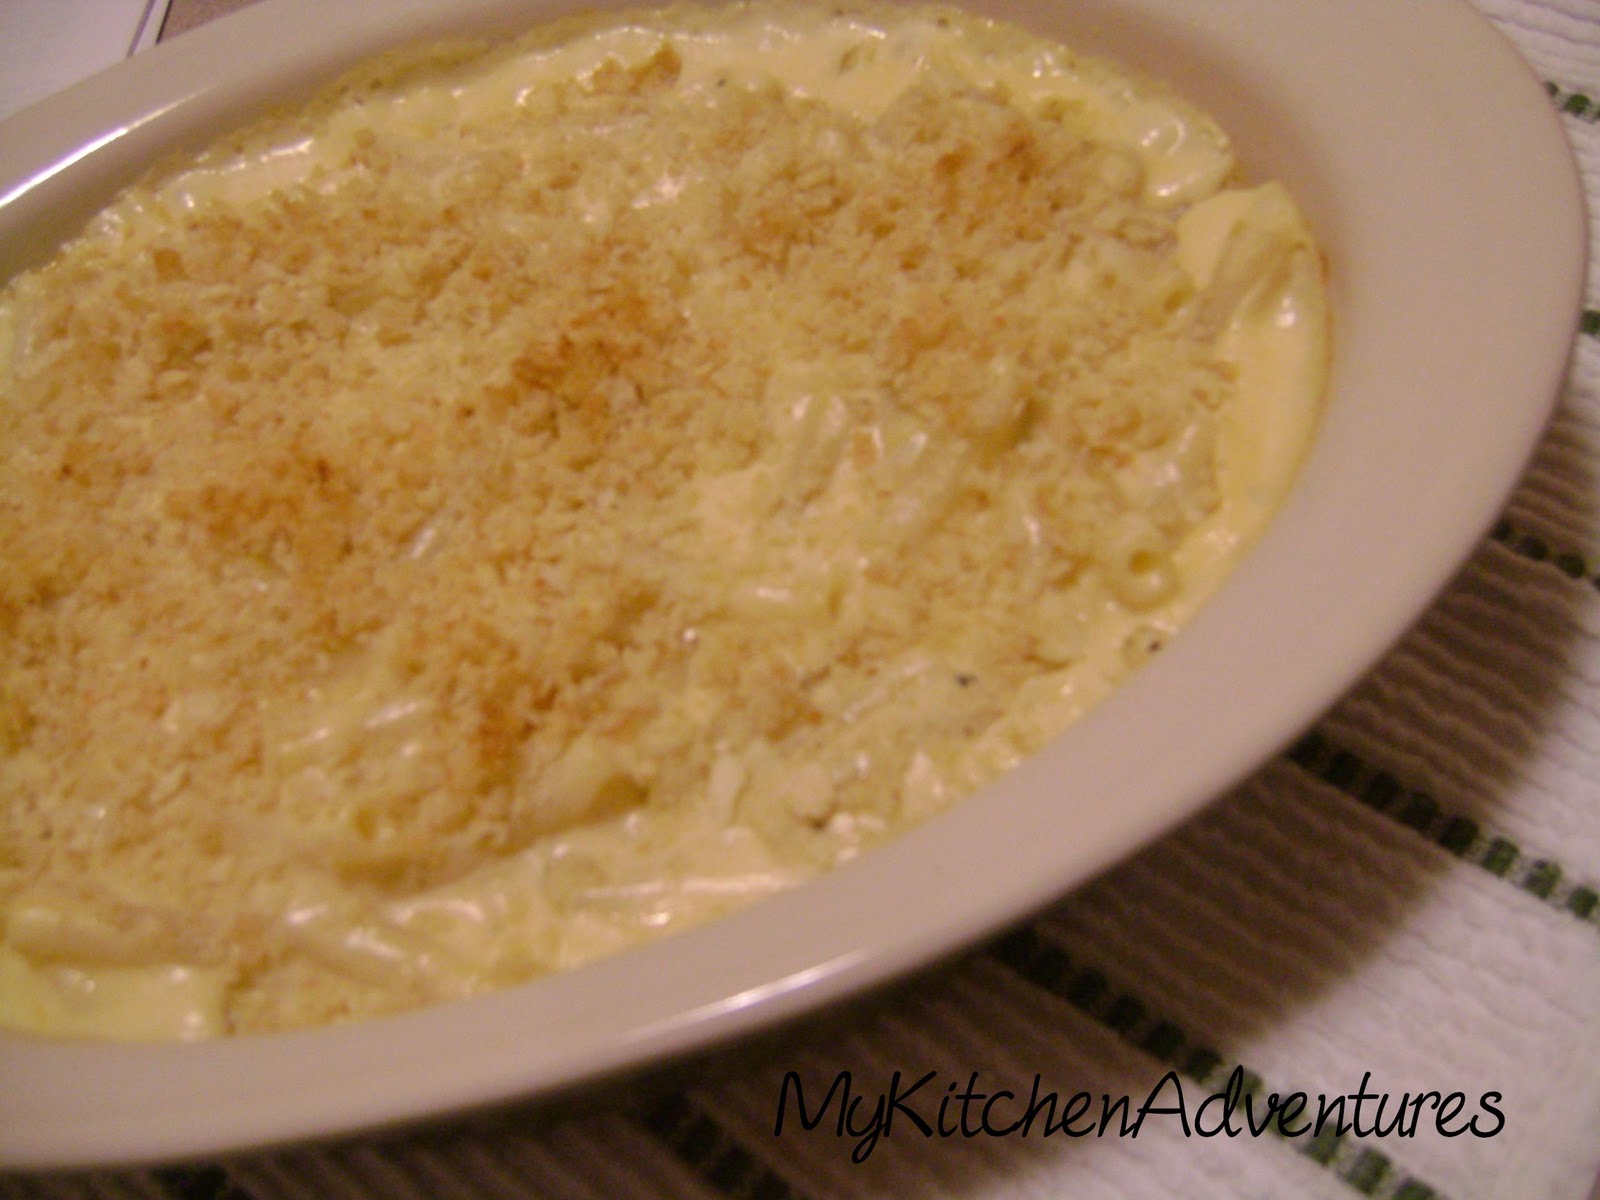
Make Over Mac and Cheese | Renee's Kitchen Adventures:  All the comfort, with less guilt!

My husband's family celebrates Christmas eve with a traditional NO MEAT meal.  I started making Ina Garten's Mac and Cheese dish a few years ago to bring, and over the years have been able to lighten it up without losing any of the flavor. I have made this dish with whole milk and skim milk, and I can't tell the difference.  I also reduced the butter called for in the original recipe. The last big change is the cheese....from full fat to reduced fat.  Mix the cheese up and use two or three different kinds if you like. There are so many low fat choices these days!   I double the recipe for Christmas eve night and make it in a 9" x 13" glass baking pan.  I also like to add sliced plum tomatoes on the top before I sprinkle the bread crumbs on for a festive look.  It's a good mac and cheese, not gooey, but more casserole like with a nice cheese flavor. 

Make Over Mac and Cheese | Renee's Kitchen Adventures:  All the comfort, with less guilt!


Make Over Baked Mac and Cheese adapted from Ina Garten 

Servings - 6  Serving size - 1/6th of casserole  Pointsplus per svg - 8 points+
Calories - 313.1,  Total Fat - 9.4g,  Carb. - 38.3g,  Protein - 17.8g,  Fiber - 1.2g

  • 8 oz. uncooked pasta ( elbow macaroni, shells, whatever you like)
  • 3 TBS. unsalted butter, divided
  • 2 TBS. all purpose flour
  • 2 cups skim milk
  • 8 oz. reduced fat (2% milk-fat) cheese of your choice, shredded ( I like to mix sharp cheddar and American )
  • 1/8 tsp. cayenne pepper
  • 1 tsp. salt
  • 1/4 tsp. pepper
  • 1/4 cup fresh breadcrumbs

1.  Prepare pasta according to package directions, but under cook it by about a minute or two.  Drain and set aside. 

2.  In large pot, melt 2 TBS. butter.  Whisk in the flour and cook while constantly whisking for 1 to 2 minutes.  ( this step is important to allow the flour to cook and get rid of the raw taste )  Heat up the milk in the microwave until warm or heat it up in a small saucepan while whisking flour and butter together.  Slowly add warm milk to flour mixtures, whisking until smooth and thick; about 1 to 3 minutes longer. 

3.  Remove from heat, add in cheese, cayenne, salt, and pepper.  Stir to melt cheese.  Add the pasta into the cheese sauce and mix.  Pour into 2 qt.casserole dish  that has been liberally sprayed with cooking spray.  

4. Melt remaining 1 TBS butter.  Mix in fresh breadcrumbs.  Sprinkle on top.  

5.  Heat oven to 375 degrees F.  Bake casserole for 30 to 35 minutes, until cheese is bubbly and crumbs are brown.  

PRINTABLE RECIPE


Like what you see?  Follow RKA on all these social networks!!

Tuesday, December 14, 2010

Hazelnut Chocolate Chip Cookies

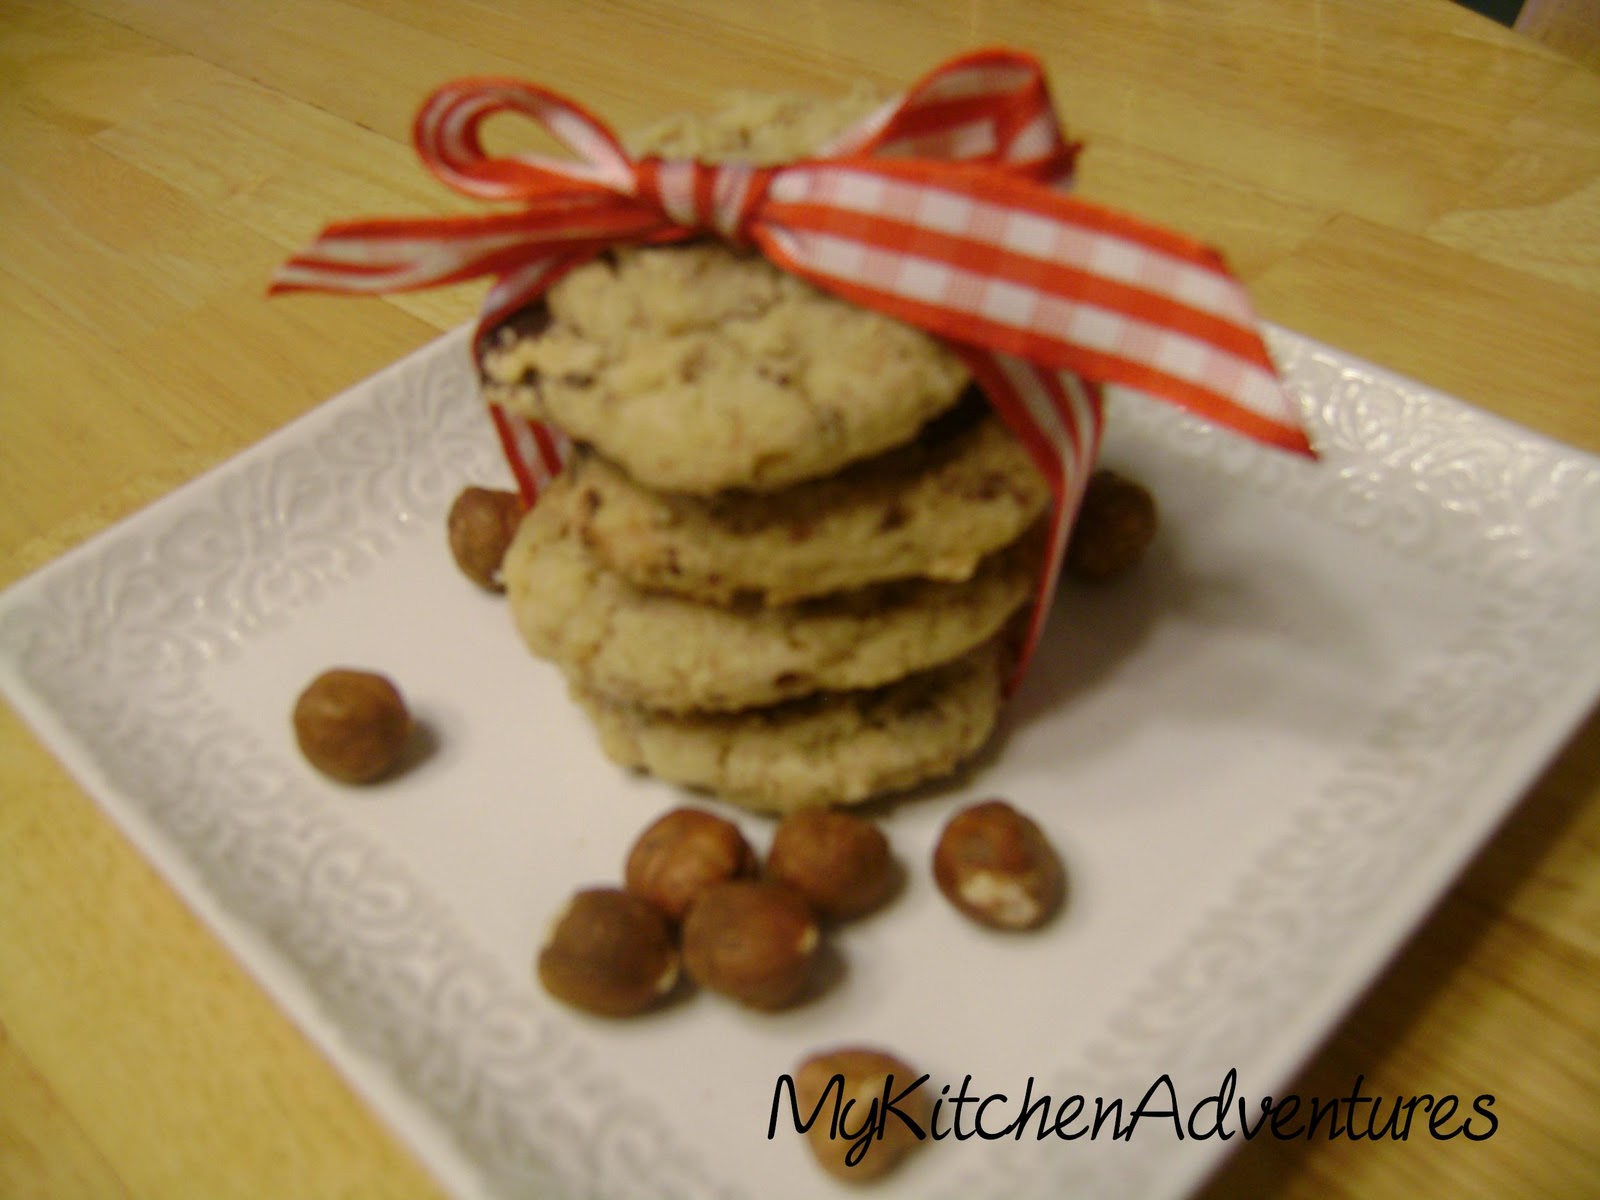
Have we had enough cookie recipes?  Can you EVER have too many cookie recipes?  LOL  I had to post this one....it is simply the best chocolate chip cookie recipe I have ever made.  It's a crispy cookie recipe, not a soft one, and the addition of hazelnuts and toffee pieces put it over the top.  The recipe is from Giada Dilaurentis and can be found here.  I am not going to repost the recipe, because I made them just as written with the exception of the skinned hazelnuts.  As you can see, I didn't skin mine, just roasted them in the oven for about 10 minutes, let them cool, and then chopped them up and added them to the batter.  I couldn't keep my boys hands off this cookie yesterday....after they cooled, I had to hide them if I wanted any for Christmas!


Thursday, December 9, 2010

Cookies Galore!!

The tree is up and the snow has been falling now for several days....it's really starting to look and feel like Christmas.  I did a ton of baking today, and would like to share with you some of the bounty!  First off...the tree...beautifully decorated by my boys!


Next, this week's cookies....


In the first picture, you see some delicious cookies and candies made from recipes found on Prevention RD;  Maple Snickerdoodles and Peanut Clusters.   Both delicious recipes can be found following the respective links.   I didn't alter a thing, as they were perfect as written!   Also on that dish are Peanut Blossoms made with miniature Reese's peanut butter cups.  The peanut blossom recipe can be easily found here, but instead of using Hershey Kisses, I substituted the Reese's cups.  The trick is to make sure to freeze the cups before placing them onto the warm cookies...this will minimize melting and leave you with an intact cup once cooled.

The second picture features Double Chocolate Mint Chip Cookies.  This recipe comes from The Cookie Bible.  The recipe is intended to allow you to "design your own chocolate cookies," so for mine, I added a package of green mint chips and half a package of dark chocolate chips.

Again, I am not furnishing any nutrition information with these recipes...although Nicole from PreventionRD does provide them with her recipes on her blog.  With today's cookies, I have just about wrapped up my holiday baking...except for frosted cut out sugar cookies...I always leave those for last! :)  Oh and butterballs and spritz...and...I guess I thought I was almost done!  haha

Double Chocolate Mint Chip Cookies

1 cup unsalted butter, softened
1 cup granulated sugar
3/4 cup light brown sugar, packed
2 tsp. pure vanilla extract
1/2 tsp. salt
2 eggs
2 cups unbleached all purpose flour
3/4 cup unsweetened cocoa
1 tsp. baking soda
1 11oz. package of green mint chips
1/2 package of dark chocolate chips

1.  Heat oven to 375 degrees F.  Beat butter, sugars, vanilla and salt in bowl until creamy.  Add eggs, beat well.  

2.  In another bowl, combine flour, cocoa and baking soda and whisk together.  Gradually add flour mixture to butter mixture until well blended.  Mix in the chips.  

3.  Drop by teaspoons onto parchment paper lined baking sheets.  Bake 8 - 10 minutes or until set.  Cool slightly, remove from cookie sheet to wire rack and allow to cool completely before storing. 

Monday, December 6, 2010

Skillet Porkchops with Apricot-Mustard Sauce

This recipe comes from Weight Watchers in 20 Minutes cookbook, and is a quick and easy way to prepare pork chops.  The original recipe calls for 5 ounce bone-in chops, but I substituted 4 ounce boneless pork loin chops with excellent results.  The sauce is sweet and slightly spicy, and works well with the pork.  I think it would also be great on chicken breasts as well.

Friday, December 3, 2010

Lemon Coconut Snowball Cookies

Let me start off by saying, this recipe is neither healthy nor low points+...but I do believe that indulging should be part of everyone's life occasionally.  It's been snowing flurries here for the last few days...dark and cloudy with light airy flakes that cover the grass, but don't interfere with travel and since it is December already ( yikes!  that came quickly didn't it? ) I decided yesterday was the perfect time to get a jump on my holiday baking. So I donned my holiday cookie baking apron, turned on some Trans Siberian Orchestra, and got to work.   I like to bake at least 5 - 10 different types of cookies, mostly to give away as gifts.

I have said it before, baking really is my passion, and it all started with holiday cookie baking when I was about 13.  Neither my mother nor my grandmother were bakers, but for some reason I got so much enjoyment out of it, I have kept honing in on my baking skills over the years self teaching with successes and failures along the way.  When I came across a cookie recipe on Two Peas and Their Pod , I knew after reading the ingredients, I really wanted to give it a try.  The original recipe called for lime, but I substituted lemon with very positive results.  These cookies are very festive looking and the dough is a dream to work with.  You will need a stand mixer though, because there is quite a bit of mixing involved.  Unlike all the other recipes I post here, I will not provide points nor nutritional information for these cookies.  Bake them, enjoy them in moderation, share them with friends and family.  The entire recipe makes approx. 2 -3 doz. 1" cookies. 


Lemon Coconut Snowball Cookies adapted from Two Peas and Their Pod

Ingredients: 
For Butter Cookie Dough-
2 1/2 cups unbleached all-purpose flour ( such as King Arthur ) 
Zest of one lemon
3/4 cup of granulated sugar, which has been pulsed in the food processor for about 20 seconds
1/4 tsp. salt
16 TBS. unsalted butter ( 2 sticks ), cut into 16 1/2 inch pieces at cool room temperature
2 tsp. vanilla extract
2 TBS. ( 1 oz. ) cream cheese, at room temperature  ( I used light, and it was fine ) 
For Frosting-
1 TBS. ( 1/2 oz. ) cream cheese, at room temperature ( again, used light with no problems )
approx. 1 TBS. fresh squeezed lemon juice ( I didn't measure, just squeezed the juice from one lemon )
1 1/2 cups confectioners sugar
1 1/2 cups sweetened shredded coconut, pulsed in food processor until finely chopped

Directions:
1.  For the cookies:   Preheat oven to 375 degrees F.  In bowl of stand mixer fitted with paddle beater, mix flour, zest, sugar, and salt on low speed until combined.  With mixer running on low, drop in the butter one piece at a time slowly; and continue to mix until the mixtures looks slightly wet and crumbly.  Add vanilla and cream cheese and mix on low until dough just comes together.  ( Like magic, it will eventually look like the picture above!  ) 

2.  With hands, roll dough into 1 inch balls and place on parchment lined cookie sheet.  ( I ALWAYS bake my cookies on parchment...makes clean up easy and makes a wonderful nonstick surface for them.  I imagine you could bake them without the parchment if you wanted or needed to, and just give the cookie sheet a spritz of cooking spray between batches. )   Bake one batch at a time in oven until lightly browned, about 12 minutes.  Remove to wire rack and allow to cool to room temperature.  

3.  For the frosting:  In the same bowl you mixed the cookies in, with the paddle attachment mix the cream cheese and the lemon juice on low until incorporated.  Add in the confectioners sugar and mix on low until a nice thick glaze like frosting appears.  

4.  Dip tops of cookies into frosting, or use a knife to spread the top, then dip the cookies into the coconut.  Allow the cookies to sit and allow the frosting to set.  About 20 minutes.  

Enjoy!!  :)

PRINTABLE RECIPE

Looking for more citrus inspired cookie recipes?  Try these: 
Sunny Citrus Sugar Cookies from Dizzy, Busy, and Hungry

Thursday, December 2, 2010

Turkey, Roasted Pepper, and Ricotta Panini

As you all know, I started the new PointsPlus program this week.  I purchased the deluxe members pack at my Weight Watchers meeting on Tuesday, and in it, was a nice little cookbook, Ready, Set, Go!  One of the lunch recipes was the Turkey, Roasted Red Pepper, and Ricotta Panini.  Since I had all the ingredients on hand, I decided to break in the new cookbook and give this recipe a go.  WOW!  Wonderful is all I have to say.  I enjoyed every bite of this sandwich....and you will too! You can use a panini press, like I did, or you can simply grill it in a nonstick pan if you don't have one...but once you make this sandwich, you will be asking Santa for a press, because you will want to make it again and again!

I use my panini press more than I had ever thought I would when I got it.  I like it because you can quickly make a simple and lovely grilled cheese or make a more elaborate concoction, and you can either spray the bread lightly with cooking spray, or leave it plain, and it still toasts beautifully.  And the best part?  no flipping.  I own a cuisinart panini and sandwich press I received as a gift a few years back. It has a nice nonstick surface and is very easy to wipe clean after using it.  It is also easy for the kids to use...which is a great bonus!


Turkey, Roasted Pepper, and Ricotta Panini  from Ready, Set Go! cookbook 

Servings - 1   Serving size - 1 sandwich  Pointsplus per serving - 6 points+
Calories - 267,  Total Fat - 4g,  Carb. - 33g,  Protein - 24g,  Fiber - 4g*

1/4 cup fat free ricotta cheese, drained
2 slices whole grain bread
1/2 cup lightly packed fresh baby spinach ( I use organic!  you should too! )
 a little less than a 1/4c roasted red peppers, ( not packed in oil ) thickly sliced
2 large fresh basil leaves
2 ounces of no salt added, fat free, skinless turkey breast ( I used some from my deli, 2 slices weighed to 2 ounces) 

 1.  Spread ricotta cheese on bottom of a slice of bread.  Layer spinach, roasted red peppers, basil, and turkey over the cheese.  Cover with remaining slice of bread.
2.  Heat the panini press up.  When it is ready, lightly spray the bottoms of the bread with spray ( or not if you don't want to...I used my misto) and put sandwich into press and close cover.  Grill until top slice of bread is golden.  Remove from press and slice in half.  OR  if you don't have a press, lightly spray bottom of nonstick skillet and grill both sides of sandwich until golden.  About 3 minutes each side. 

*please note, the bread you use may alter the points since brands of bread nutritional values vary.  I used Nickles 35 Multigrain reduced calorie bread, and for two slices, it is only 2 points+, which altered the final nutritional stats of this recipe for my sandwich.  Although your pocket guide may tell you two slices is worth 3 points+, taking the nutritional information off the bread sleeve gave me 2 points+, and per WW instruction, THIS is the correct value.  But I have published it here, as it is written in the cookbook, not for the sandwich I made with the Nickles bread.   

Wednesday, December 1, 2010

Asparagus, Bacon and Cheese Stratta

I love making strattas...they are easy to assemble and can be made ahead, stored in the refrigerator and popped in the oven at a later time, making them an ideal dinner for this busy time of year!  I have been making a stratta for Christmas morning now, for several years.  I assemble it the day before, and pop it in the oven while the kids open their gifts.  Then we all sit down to a nice, warm, healthy breakfast and enjoy each others company.  I found this stratta recipe in Weight Watchers Quick and Easy Entertaining booklet and modified it a bit.  We had it for dinner tonight, and it was really good!  I served it with a simple spinach salad with roasted red peppers, mushrooms, and scallions in a balsamic dressing.  Since you only need three pieces of bacon for this recipe, you could either buy just three pieces from your deli or buy a whole package, portion out the bacon in 3 -4 strips, use what you need to for this recipe and freeze the rest.  I bought a whole package and froze the remainder in 4 strip packs with waxed paper and then put them all in a plastic bag in the freezer.  This way, the next time I need bacon ( and in a small amount ) I will just take out the mini waxed paper pack and use what I need. 


Asparagus, Bacon and Cheese Stratta adapted from Weight Watchers Quick and Easy Entertaining

Servings - 6   Serving size - 1/6th of recipe  Points per svg - 5 points  PointsPlus per serving - 6 points+
Calories - 243.2,  Total Fat - 11.3g,  Carb - 16.7g,  Protein - 20.5g,  Fiber - 3.9g

3 slices of bacon
1/2 cup onion, diced
2 cups asparagus, frozen and thawed, cut into 1" pieces
1 cup of mushrooms, sliced ( optional )
6 slices of light whole wheat bread ( such as Nickels reduced calorie )
4 large eggs
1 1/4 cup eggbeaters
3/4 cup skim milk
2 tsp. dijon mustard
1/2 tsp. kosher salt
1/4 tsp. fresh ground black pepper
2 TBS. grated Parmesan cheese
4 oz. shredded swiss cheese

1.  In medium skillet, cook the bacon until crisp.  Place cooked bacon on paper towels and set aside.  Drain the bacon fat from pan, then add the onion.  Saute until soft, about 3 minutes.  Add the mushrooms if using.  Saute another 3 minutes.  Turn off the heat, and add the asparagus.  Mix to combine the vegetables.  Set aside.

2.  In small bowl, mix the eggs, eggbeaters, mustard, milk, salt and pepper until combined.  Set aside. 

3.  Spray a 9" x 13" baking dish liberally with cooking spray.  Place the slices of bread on the bottom.  Its ok if they overlap a bit.  Spread the vegetable mixture on top of the bread.  Chop up reserved bacon and sprinkle on top of veggies. Followed by the egg mixture and then the cheeses.  Cover with foil, and allow to sit in refrigerator for at least 30 minutes or overnight.

4.  Preheat oven to 375 degrees F.  Bake the stratta for 30 to 40 minutes or until the egg is set.  Remove the foil and bake for another 5 - 10 minutes to allow the cheese to brown a bit.  Let sit for 10 minutes before cutting into 6 pieces.  Enjoy! 


>